Wednesday, June 27, 2012

Asian Sesame Chicken Drumsticks


If you've been reading for awhile, you know I'm a "bring your lunch to work" kind of girl.  A lot of it is because I live alone and almost always have leftovers.  And the fact that I make good food.  Another reason is that I'm cheap.  Guess which reason my family will tell you is the prevailing one?  Personally, I'm sticking with the tasty leftover line.  Because seriously, if you had to decide between these and a weekly dose of taco bell hard tacos, does price really come into the picture?

This recipe has me reconsidering my every day lunches.  I made half a dozen chicken wings on Saturday night, ate 2 immediately because they were dang tasty, and threw the other 4 into a bag in the fridge.  Which gave me a week of solid work lunches.  Chicken on top of salad, chicken on top of sauced egg noodles, chicken with a side of roasted potatoes.  It was one good week.  One good, easy week.  It was almost too easy.

I am so close to becoming one of these people that roasts a whole chicken over the weekend and then eats it all week long.  I think I'm ok with this.  Just imagine the possibilities: chicken salad, chicken soup, chicken tacos!  Seriously, I give it till the fall before there is a whole roasted chicken post up here.  And only that far out because I can't imagine roasting an entire chicken in my oven when it's 95 and humid outside.  Not complaining, just saying...

Asian Sesame Chicken Drumsticks
adapted from theendlessmeal.com

6 chicken drumsticks
1 1/2 Tbsp. sesame oil
2 Tbsp. dark brown sugar
1 Tbsp. black sesame seeds
1 tsp. powdered ginger
1 tsp. salt
2 tsp. minced garlic
1 tsp. cayenne pepper

Preheat oven to 425 degrees.  Line a rimmed baking sheet with foil.

Using a paper towel, pat chicken dry.  Place in large bowl and drizzle with sesame oil.

Thoroughly combine remaining ingredients.  Mix well and sprinkle over chicken.  Toss everything until chicken is well coated.  Move chicken to prepared baking sheet and bake for 20 to 25 minutes until chicken is cooked through.

Friday, June 22, 2012

CinnaMocha Fudge Pops


I did something kind of crazy.  I'm thinking about blaming it on the heat.  Or the fact that these days it doesn't get dark until 9 pm.  Or, you know, the whole "I love chocolate thing".  Or some combination of those three.  Regardless of the reason, I still did something a little, tad-bit crazy.  You see, I went and took this pudding recipe here and, ahem, poured it into some dollar store molds.  Yeah, I made FudgeSicles.  Except, I made the cinna-mocha-latte wonderful kind.

It just felt so right.  Pudding, popsicle molds, mini chocolate chips on top (if chocolate happens to be your thing or something...).  It was happy and summer and reminded me of the homemade pudding-pops of days long gone.  And then I ate one.  And it tasted just close enough to right that I skipped the length of my somewhat clean living room.  (Real world advice: skipping whilst holding a popsicle in your mouth is highly inadvisable.  Even more so when your popsicle molds produce slightly phallic popsicles like mine do.  Ok, the phallic-nature has nothing to do with safety.  It just had to be said.  Because you are thinking it.  And that's ok too, because that was my only thought the entire picture taking process... Anyways, back to the skipping...).  I skipped.  And I vowed to always have popsicles, fudge or any other variety, always in my freezer.  At least while 8 pm still has daylight.

CinnaMocha Fudge Pops
Adapted from a pudding from CL April 2012

The weird mouth-feel that my first go round with these had (in the warm pudding form) worked to our advantage once frozen.  Unfortunately, the freezing also seemed to do something with the espresso.  It lost is.  I would suggest doubling that (reflected below).  Also, 1/2 tablespoon is A LOT of cinnamon.  I'm cool with that.  If you're not, you've been warned...

1/2 c. granulated sugar
1 egg (large)
2 c. 2% milk
1/3 c. unsweetened cocoa
1 Tbsp. cornstarch
2 Tbsp. instant espresso granules
1/2 Tbsp. cinnamon
1/8 tsp. salt
1 oz. bittersweet chocolate
1 tsp. vanilla extract
1 tsp. unsalted butter 

In medium saucepan, whisk together sugar and egg.  Once egg is incorporated, continue to whisk in next 5 ingredients (through salt).  Once combined, put pan over medium high heat stirring consistently, for about 14 minutes or until mixture becomes thick and bubbly.  Remove from heat.  Add chocolate and whisk together until melted and smooth (and swoon-inducing!)  Whisk in vanilla and butter.  Let cool slightly.

Stand up Popsicle molds.  If you so desire, sprinkle a few mini chocolate chips in the ends, just for shits and giggles.  Pour in slightly cooled pudding.  For even more fun, sprinkle a few more mini chocolate chips in.  They will get melted and pushed deeper in by the stick.  ignore your desire to laugh inappropriately at the previous sentence.  Freeze until firm, unmold and enjoy!

Sunday, June 17, 2012

Green Chiles & Corn Stuffed Tomatoes


Yum!

That's right. No story, no random paragraph of intro. No complicated analogy. Just, Yum! Because Yum! was unexpected, but Yum! was what we got. Who would have guessed it?

Because, when I tagged this in this month's CL issue, yum! wasn't what I was expecting. What I was expecting was healthy, filling, tasty.  All of which this was.  But inhalable goodness?  I never would have guessed it.


Even more amazing is that is in fact quinoa stuffed in those tomatoes. Quinoa! I’ve tried to like quinoa for awhile now.  Ben bought me a giant Costco bag worth way back when I lived in Greenville.  And, well, I wanted to love it.  I tried to love it. And I failed, miserably. But now, now I actually have a way to use my 27 lb. bag of quinoa. And enjoy it. Who would have guessed it?


Green Chiles and Corn Stuffed Tomatoes
Adapted from CL's June 2012 issue

I cut this recipe in half because I wasn't sure on how well the leftovers would hold up.  I plumped it back up to it's original size just for you though.  Oh, also important, for a true meatless main dish, do not use chicken broth.  Use vegetable broth or water.  I'm still calling this meatless because there is no actual meat, but I wouldn't use that logic with your local vegetarian.  Also, this is a bit time consuming!  So as a heads up, plan for at least an hour, start to finish, maybe even longer.  Enjoy!

6 large tomatoes
1 tsp. salt, divided
1 c. uncooked quinoa
1/2 c. chicken broth
2 poblano chiles
4 ears fresh sweet corn
1 large onion, chopped
1 tsp. dried oregano
1 tsp. cumin
1 Tbsp. extra virgin olive oil
Juice from 1 lime
1/4 tsp. ground pepper
4 oz. colby-Jack cheese, shredded (~1 c.)

Wash tomoatoes well.  Slice tops off.  Using a large spoon, gently scoop out tomato insides and reserve.  Leave shells in tact.  Sprinkle 1/2 teaspoon salt into empty tomatoes, and invert on wire rack over paper towels to dry out for 20-30 minutes.  Using fine mesh sieve, drain tomato pulp for juice (you are aiming for 1 cup of liquid here!)  Reserve liquid and discard pulp.

Rinse quinoa once or twice, using sieve.  In medium sauce pan, combine quinoa, 1 cup of tomato juice, 1/2 cup chicken broth (if you don't have 1 cup of tomato juice, add chicken broth or water to make 1 1/2 cups liquid), and remaining 1/2 teaspoon of salt.  Bring to a boil.  Cover, reduce heat and simmer for 15 minutes or until quinoa is cooked and liquid is absorbed.  Fluff with fork.

Preheat broiler.  Cut poblano chiles in half.  Discard seeds and membranes (leave membranes if you want more heat).  Place cut side down on foil lined rimmed baking sheet.  Flatten with hand.  Broil for 8-10 minutes, close to heat, until chiles are black.  Remove and place in paper bag (this will help with peeling!).  Meanwhile, cut corn from cob.  Combine with onions.  Spread out on same foil lined rimmed baking sheets and broil for 8-10 minutes, stirring a few times.

Remove chiles from paper bag.  Peel ski from chiles and chop.  Add broiled corn and onions.  Mix together with oregano, cumin, oil, lime juice and pepper.  Combine corn mixture with cooked quinoa, mixing well.

Turn oven down to 350.  Dry out tomato shells with paper towels and place on foil lined rimmed baking sheet.  Stuff quinoa mixture equally into tomato shells, really packing in as necessary.  Divide cheese equally among tomatoes, patting to secure on top of tomatoes.  Bake in oven at 350 for 15 minutes.  To brown cheese on top, place under broiler for a few minutes.  Serve warm!

Tuesday, June 12, 2012

Homemade Corn Tortillas


Psshhh... Check this out. I made corn tortillas. Homemade - like from scratch. The quarter Mexican in me is gloating whilst salsa dancing. You'll have to forgive her a little, she's quite the horn-tutting multitasker. You also have to admit, that's kind of cool. And delicious.

Yes, it only has 3 ingredients. But it requires the use of a specialty gadget called a tortilla press. Or, if you're an ameteur kitchen MacGyver like me (read--cheap), two sheets of plastic wrap and a glass pyrex pie plate. Which also means, this was a little time consuming. There is an hour built in wait, which is no bigger, the dough is just chilling out and you're free to chill out too, but the ball rolling, squashing, pressing, pan frying deal? It's going to be a little bit of a time commitment.


I read everywhere that once you've gone homemade, you won't go back. I kinda see myself able to go back.  About half way through all the ball rolling, squashing, pressing, pan frying assembly line I had set up for my self, I found myself wondering, is it really worth it?  I can get a dozen of corn tortillas at my local market of 39 cents.  That is less than 4 pennies per tortilla.  These are delicious, yes, and you get to parade around the whole evening boasting your accomplishment ("I made corn tortillas!"!), but you can get a dozen for less than two shiny quarters. I know myself, and when I want a lazy Taco Tuesday night, this isn't the way to go. I'm going to be reaching for a 39 cent bag.

This is absolutely a BGCB recipe.  I homemade corn tortillas for crying out loud!  And they were damn tasty. You should try it yourself too. So that your inner Mexican can salsa-around with accomplishment. They just aren't Taco Tuesday ready yet. I'm going to do a little researching, if these are pre-pan frying freezable maybe we might just have to revisit this conversation. I'll let you know!

Homemade Corn Tortillas
Adapted from Bob's Red Mill

2 c. Masa Harina (aka Corn Flour)
1/2 tsp. kosher salt
1 1/2 - 2 c. hot water
Canola Oil

In large bowl, whisk together masa harina and salt. Slowly drizzle in hot water and mix. Give up with the spoon and start kneading with your hands. You are looking for a consistency that is "firm and springy when touched, not dry or sticky". Think Play-Dough. Cover with a clean towel and let rest about an hour.

Heat up a cast iron skillet over medium heat. Using a brush, lightly coat with canola oil. If you have a tortilla press, bust it out. If you have a tortilla press, you probably don't really need much instruction...

For those without: roll dough into about a 1-2 inch ball. flatten into a disk shape in your palm. Place between two sheets of plastic wrap. Using a flat bottomed pan or pie tin (I used a glass pie plate. It was nice to see through to the tortilla underneath), press dough ball until very thin and flat. Carefully remove from plastic and put in hot cast iron. Cook 1-2 minutes (bubbles will start to rise inside) before flipping. Flip once, cooking 3-4 minutes total. Brush cast iron with canola oil as needed.

To keep warm, keep under foil tent.

Bob says this makes 12 6-inch tortillas. Mine were a little smaller and I got 20.

I made these two Thursday night's ago. A week later, wrapped tightly in plastic wrap, they were still good in my fridge.

Thursday, June 7, 2012

Lemony Ricotta Fettuccine


Hey.  How’s it going?  I feel like I’ve been away from you for awhile.  Which isn’t true of course, I was just here last Saturday going on and on about the bliss that is blackberry mojitos.  So, why do I feel like I miss you?  Because last Saturday was also the day my blessed camera-to-computer-cord finally returned to me.  And then it was a day of playing catching up.  And a day of blackberry mojitos.  But now, blackberry mojitos all gone (ssiigghh.....), it’s time to get back into the rhythm of things.  With sensible things, like crisp pancetta, fresh ricotta and early summer time dinner recipes.

So, what have I missed telling you?  The big news it, they built a new grocery store near me.  It’s a Valli Produce.  Totally ok if you have never heard of them, it’s an Illinois thing.  There’s an older one near my work, older being the operative word.  There’s an even older one near Ben, which we avoid unless necessary, aka the need for fresh mozzarella arises.  But this new one?  It’s kinda shiny and big and well-lit.  And not only does it have fresh mozzarella, it also has fresh ricotta, fresh feta and fresh pasta.


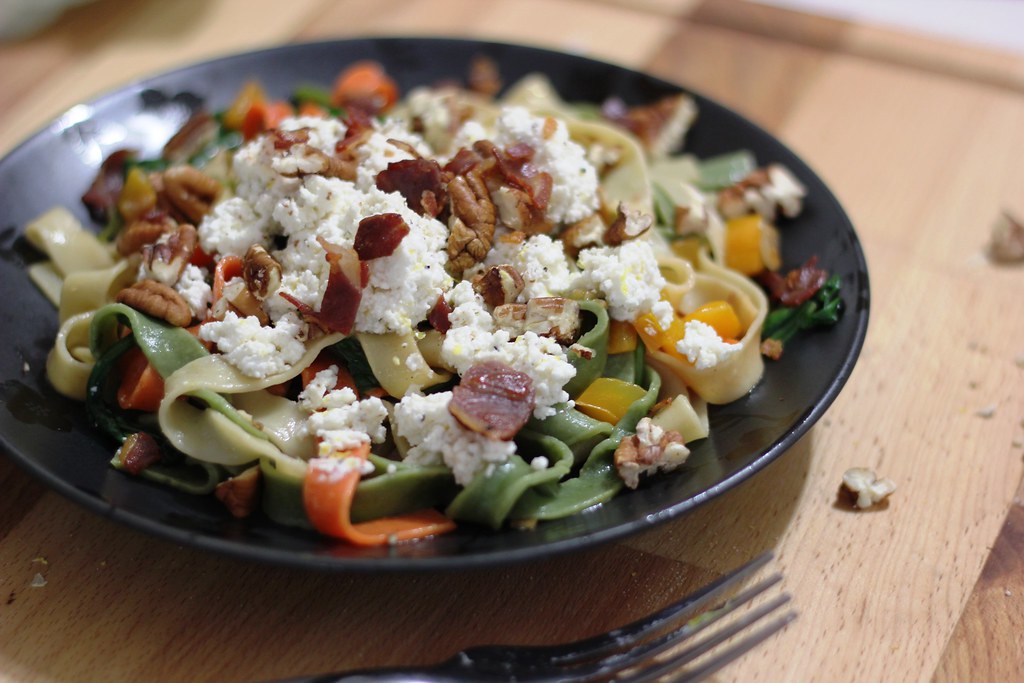
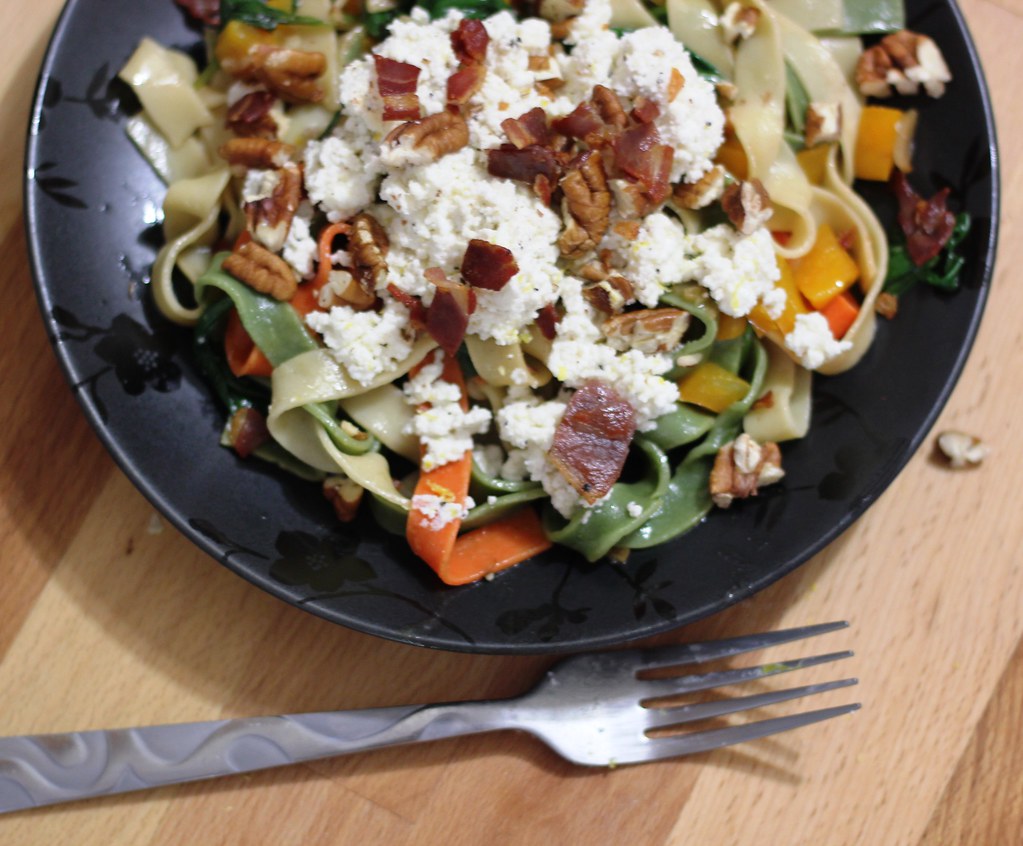
So, following suit from CL’s April issue, I bought some fresh pasta.  I doctored up my fresh ricotta with lemon and pepper.  Then I cooked up some bell peppers and shallots and spinach.  I toasted pecans and crisped up leftover pancetta.  Then I got a little crazy.  Pasta and vegetables were tumbled into ricotta.  It got creamy and thick and fabulous.  On top, the crumbled, crisp bits of cured pork deliciousness helped the toasted pecans bring some real crunch.  It was bright and textured and fabulous.  And all that?  It took less then 15 minutes.  That’s less time then it took to write this post.   And let’s face it, there is sun outside.  Let’s not waste it.

Lemony Ricotta Fettuccine
Adapted from CL's April 2012 issue

The best part is that you don’t need a recipe.  Of course, I’m still going to give you one, but you don’t need it.  Take trip through the farmer’s market or produce section.  If asparagus and spring onions are looking like their normal gorgeous selves, grab them and run with it.  If it goes with cheese and lemon, you’re good to go.  By the way, crisp pancetta goes with everything basically, so you’re safe there...

9 oz.. fresh fettuccine
9 oz. ricotta cheese
Zest & juice of 1 lemon
3/4 tsp. salt, divided
1/2 tsp. pepper
1 1/2 Tbsp. EV olive oil, divided
1 bell pepper (orange or red), diced
1 shallot, diced
1/3 c. pecans
0.75-1 oz. Pancetta, chopped
4 garlic cloves, diced
3 c. baby spinach

Cook pasta.  Reserve a coffee cup-full of pasta water before draining pasta.

Combine lemon zest, 1/4 teaspoon salt and pepper with ricotta cheese.  Mix well.

In large skillet, add pecans.  Toast for 3-5 minutes until fragrant.  Remove and roughly chop, set aside.  In same skillet, crisp up Pancetta.  Remove and let drain on paper towel.

In same skillet, heat 1 tablespoon oil over medium high heat.  Add bell pepper and shallot.  Saute about 2 minutes, until bell peppers are soft.  Add garlic and remaining salt, continue to saute 1-2 minutes longer.  Stir in remaining olive oil and lemon juice.  Add cooked pasta and spinach, tossing so veggies and garlic are evenly distributed.  Add pasta water  to desired consistency and cook until spinach wilts, about 1 minute.  (I only added a little less than 1/2 cup).

Top with ricotta mixture and chopped pecans and Pancetta.  If you have leftovers, leave off ricotta, pecans and Pancetta.  Heat pasta then add toppings.
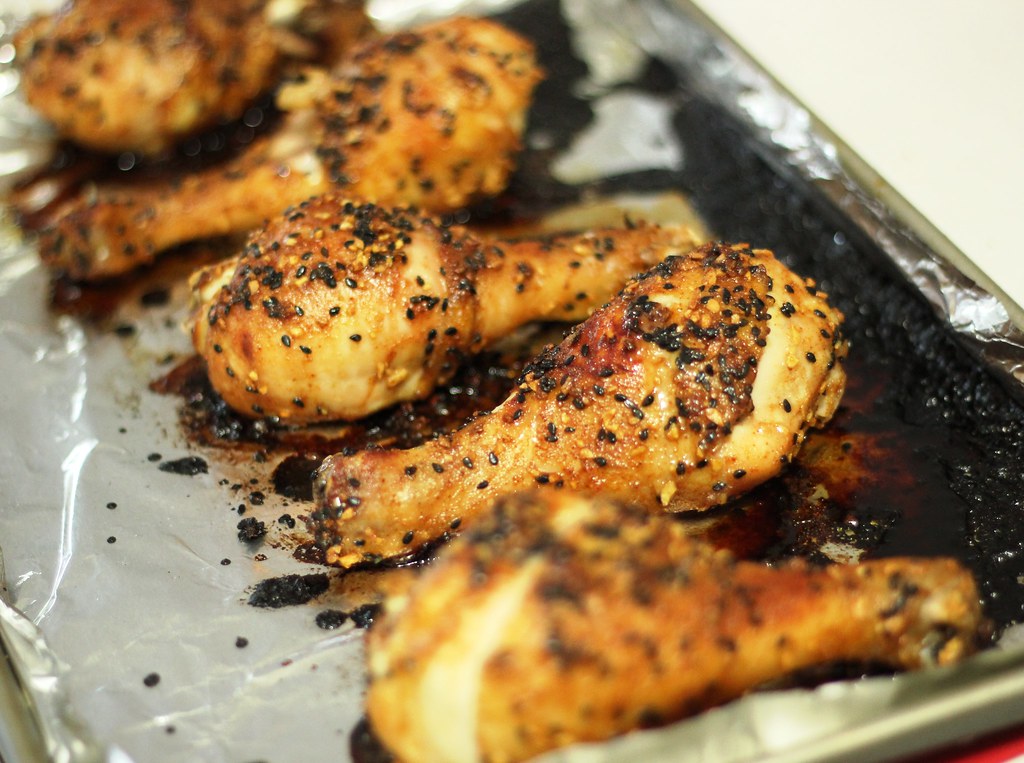
Saturday, June 2, 2012

Blackberry Mojitos


I get all jealous when I hear people waxing on poetically about the perfect summer drink that they sip relaxingly on lazy Sunday afternoons, on a porch, with their significant other.  For some reason, I want that.  And really, I don’t have anything that has been holding me back from this lazy summer nirvana.  I’ve got the porch, with a cute wrought iron table and chairs set, with French doors that open into my living room and kitchen, with my cute, little herb garden.  I’ve got the boy, and he’s cute too.  What I don’t have is the perfect drink.   So without further ado, may I introduce round one, contender numero uno in the “Let’s find Liz a good summer drink” contest: blackberry mojitos


And what a winner we have already. I was already in love with this drink just from muddling the sugar and mint leaves. The fragrance was delicious and all I could think about was making a sugar scrub out of it and then wanting to bathe in it. So very luck for me, I was able to refrain. And then it gets better. You add the blackberries, rum and lime, crush it up a bit and... really, all I can say is that there should be a mint blackberry lime jam, and I would probably want to bathe in that too. Sure, it might die my skin purple, but I'm thinking it just might be worth it. Alright, we've gotten on a weird tangent here, so let's just put our computers down, whip up a glassful of blackberry mojito and call it a wonderful, sun shine filled, summer day.

Blackberry Mojito
adapted from fork vs. spoon

For 1 serving:
1 Tbsp. Sugar
~10 mint leaves (I used a mix of spearmint & sweet mint)
6-8 blackberries
1 oz. rum (2 Tbsp.)
1/2 lime
3-4 oz. sparkling water

Add sugar and mint leaves to glass. Muddle together to release oils and fragrance from leaves. Add blackberries, rum and juice of lime half. Muddle again to create drink base. Add ice and top off with sparkling water.

Sit on porch, kick back and enjoy!