Showing posts with label Cocoa Powder. Show all posts

Monday, November 5, 2012

Mocha Latte Biscotti


You would think that by this point in my life, the "holy crap I am almost a quarter century old" point, I would make more sense, at least to myself.  But, alas, it is not to be the case.  I am still a confusing mystery, especially to myself.  Here, let me prove it to you:

I am surprised every  month on the 11th that my cable/internet bill is due.  It just doesn't make sense in my head.  Plus, I believe internet should be free.  (But I think that's probably mostly because I am cheap...)

I like roasted potatoes with salt, lots of pepper and olive oil, but I make them very rarely.  They're easy to make and quick, I usually have potatoes on hands, but I just don't do it.  I don't know why.

I like fall and I love Thanksgiving, but am also terrified because it only leads to December.  I do not like the cold.  And I really hate the snow.

I am more excited to vote in the election this year than I was 4 years ago.  I realize that I am in a very small, very strange minority.  I only voted 4 years ago because my mom sent me an absentee ballot.


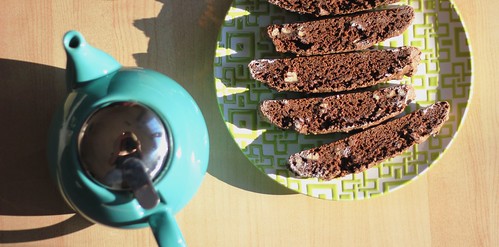
I did solve one mystery though, in my 287th month of life. I finally know well enough to not even bother taking pictures of chocolate dough in a log shape.  It's just going to look like a giant turd and no amount of plating, special-spoon-using, or lighting tricks will change that.  That's a start, right?

Mocha Latte Biscotti
Adapted from the GE website.  I know it's strange, roll with it.

So, I actually got this recipe from GE's HealthAhead website.  HealthAhead is the GE program in which they promote healthy eating, exercising, etc., in the hopes that we don't notice it's all for ulterior motives.  I'm not cynical, it's truth.  I am the oh-so-lucky HealthAhead champion for my site.  It is as terrible as it sounds.  But at least it will help explain why there may be increased blogging about HealthAhead recipes...

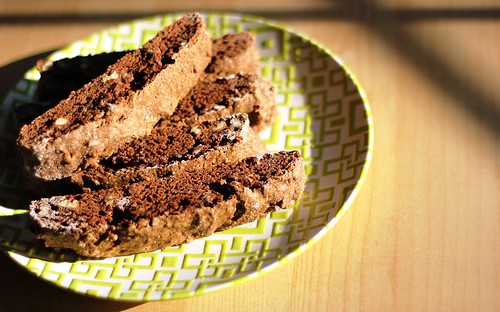
For a "healthy" recipe (read, super duper small portion sizes), these were good, as long as you ignored the portion sizes comment.  I love my biscotti and had high hopes for these.  It was chocolate plus espresso for crying out loud.  My hopes weren't dashed, just pretty firmly let down.  I mean, they were good, just not these.  (Truth time: Ben and I finished the whole batch in less than 3 days with no complaints.  I just doubt I would ever make them again).

2 c. flour
1 c. granulated sugar
1/3 c. chopped pecans
1/4 c. unsweetened cocoa powder
1/2 tsp. baking soda
1/2 tsp. baking powder
1/4 tsp. kosher salt
2 tsp. espresso powder
2 tsp. hot water
1 tsp. pure vanilla extract
2 eggs
1 egg white

Preheat oven to 325.  Line a baking sheet with parchment paper or silpat.  Lightly sprinkle with flour.

In large bowl combine all dry ingredients, from flour to salt.

In separate bowl, mix together water and espresso powder until the powder has dissolved completely.  Whisk in vanilla, eggs and egg white.  Slowly add wet ingredients to dry, stirring carefully until dough just comes together.

Turn dough out onto a floured surface.  With floured hands, knead a few times.  Dough will be incredibly sticky.  Transfer dough to prepared baking sheet and using your hands, shape dough as best you can into a long long, about 3 inches wide and an inch tall.  Put dough in oven and bake for 30 minutes.  Dough will be hard and lightly browned.

Remove log from baking sheet and let cool on wire rack 10-15 minutes (maintain oven temp).  Using a serrated knife, slice log into 1 inch slices (portion control be damned!) and place back on cooking sheet, cut side down.  Bake at 325 for 10 minutes, then flip biscotti and bake another 8-12 minutes, until biscotti are hard.  Cool on wire rack.  Enjoy with tea!

Monday, August 13, 2012

World Peace Cookies


And against all odds, I am back from Minnesota alive, in one piece, well rested and a better fisherwoman to boot.  Unknown to me at the beginning, Minnesota turned out to be exactly what a late summer vacation should be:

A cup of tea while watching boats bob by the dock in the morning.  Followed by a few hours fishing with some wonderful, funny conversationalists.  Stuffing myself silly every day at lunch on extremely fresh, fried fish and enough sides and goodies to be on par with Thanksgiving.  Napping or reading in the afternoon sun, in front of the lake, with a breeze.  Then of course, a few cold beers and late evening fishing.


It was a perfect enough vacation to make you actually believe that things like world peace, and cookies that could bring about its existence, actually could exist.  Or in the case of these chocolaty, crispy, melty wonders, that they actually do exist.

World Peace Cookies
Who else?  Via the Smitten Kitchen

I've made these twice now.  These are not the gooey chocolate chip cookie kind of cookies.  They are sandy, like shortbread, but with marvelous little pockets of melted dark chocolate.  They're addicting.  Just cut them a little thicker than you think and you're in business.  Also, doubling this recipe just to have a log or two of dough frozen in your freezer is a very, very wise idea.

1 1/4 c. flour
1/3 c. unsweetened cocoa powder
1/2 tsp. baking soda
11 Tbsp. unsalted butter, room temp.
2/3 c. light brown sugar
1/4 c. sugar
1/2 tsp. kosher salt
1 tsp. vanilla extract
5 ounces bittersweet chocolate, chopped in small chunks

In stand mixer with paddle attachment, cream butter on medium speed until pale and creamy.  With mixer running, add both sugars, salt and vanilla.  Beat until mixture is well incorporated and fluffy, a few minutes.

Sift together flour, cocoa and baking soda.  With mixer running on slow speed, gradually add flour to butter as fast as you can.  It will poof and make somewhat of a mess.  It's cool, you'll soon have cookies to keep you company as you clean.  Mix only until just incorporated.  Add chocolate chips and just stir them in.  Try at this point to work the dough as little as possible.

Turn out the dough onto a sheet of plastic wrap.  Eye ball the dough into 2 equal pieces, each on their own sheet of plastic wrap.  Using your hands, roll dough into log, about 1.5 inches thick.  Wrap well in plastic wrap and refrigerate them at least 3 hours, or freeze.  (Deb's note: you can freeze the dough up to 2 months).

Preheat oven to 325 F.

Once very chilled, using a "sharp thin knife, slice the logs into rounds that are 1/2 inch think".  They're going to crumble apart like crazy on you.  Just do your best and squish them back into rounds.  Bake for 12 minutes at 325 degrees F (13 minutes if dough is frozen through).  "They won'y look done, nor will they be firm, but that's just the way they should be".  Let cool on cooling rack, resist the urge to eat immediately.  One, it'll totally burn your tongue.  Learn from my mistakes kids!  Two, they sort of really do taste better just slightly warm or at room temperature.  Share! Enjoy! Go World Peace!

Friday, June 22, 2012

CinnaMocha Fudge Pops


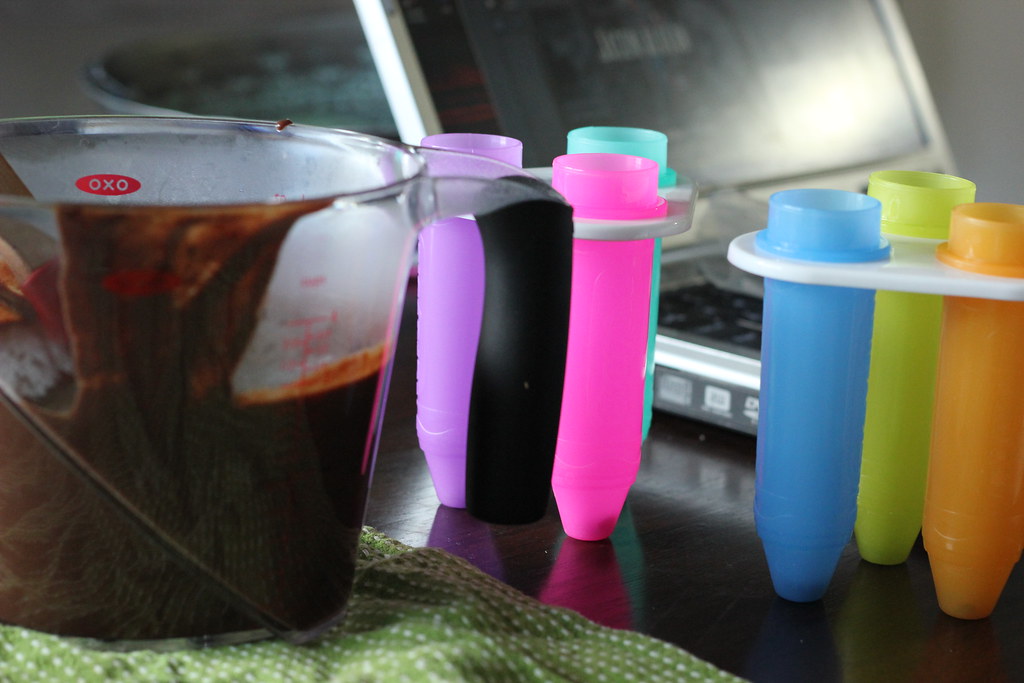
I did something kind of crazy.  I'm thinking about blaming it on the heat.  Or the fact that these days it doesn't get dark until 9 pm.  Or, you know, the whole "I love chocolate thing".  Or some combination of those three.  Regardless of the reason, I still did something a little, tad-bit crazy.  You see, I went and took this pudding recipe here and, ahem, poured it into some dollar store molds.  Yeah, I made FudgeSicles.  Except, I made the cinna-mocha-latte wonderful kind.

It just felt so right.  Pudding, popsicle molds, mini chocolate chips on top (if chocolate happens to be your thing or something...).  It was happy and summer and reminded me of the homemade pudding-pops of days long gone.  And then I ate one.  And it tasted just close enough to right that I skipped the length of my somewhat clean living room.  (Real world advice: skipping whilst holding a popsicle in your mouth is highly inadvisable.  Even more so when your popsicle molds produce slightly phallic popsicles like mine do.  Ok, the phallic-nature has nothing to do with safety.  It just had to be said.  Because you are thinking it.  And that's ok too, because that was my only thought the entire picture taking process... Anyways, back to the skipping...).  I skipped.  And I vowed to always have popsicles, fudge or any other variety, always in my freezer.  At least while 8 pm still has daylight.

CinnaMocha Fudge Pops
Adapted from a pudding from CL April 2012

The weird mouth-feel that my first go round with these had (in the warm pudding form) worked to our advantage once frozen.  Unfortunately, the freezing also seemed to do something with the espresso.  It lost is.  I would suggest doubling that (reflected below).  Also, 1/2 tablespoon is A LOT of cinnamon.  I'm cool with that.  If you're not, you've been warned...

1/2 c. granulated sugar
1 egg (large)
2 c. 2% milk
1/3 c. unsweetened cocoa
1 Tbsp. cornstarch
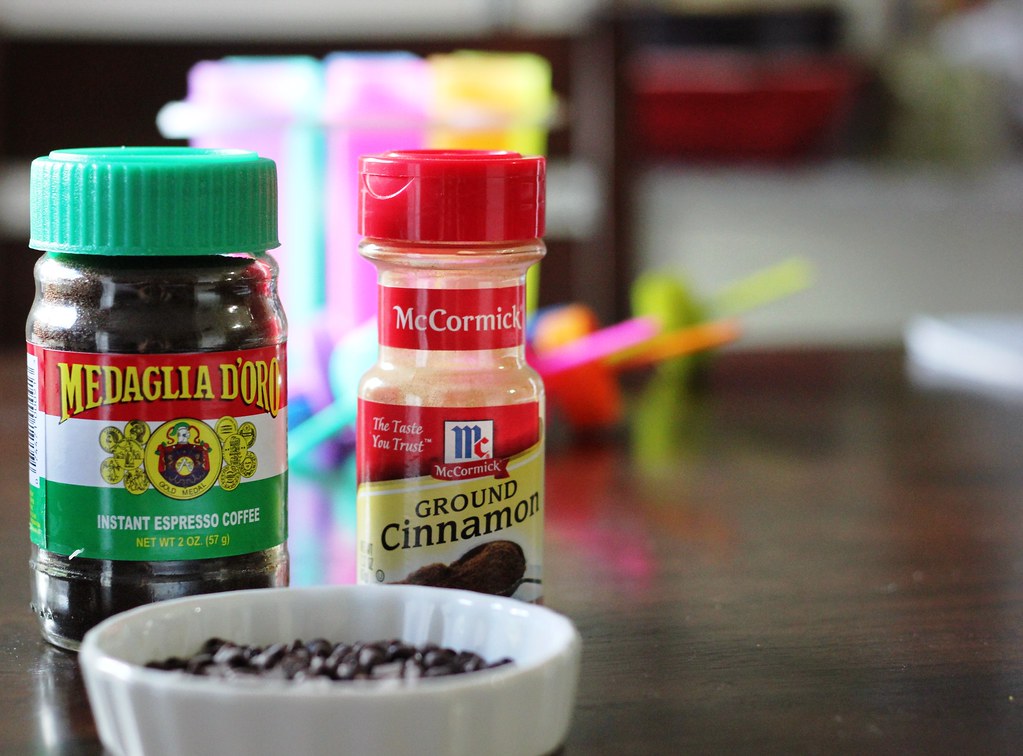
2 Tbsp. instant espresso granules
1/2 Tbsp. cinnamon
1/8 tsp. salt
1 oz. bittersweet chocolate
1 tsp. vanilla extract
1 tsp. unsalted butter 

In medium saucepan, whisk together sugar and egg.  Once egg is incorporated, continue to whisk in next 5 ingredients (through salt).  Once combined, put pan over medium high heat stirring consistently, for about 14 minutes or until mixture becomes thick and bubbly.  Remove from heat.  Add chocolate and whisk together until melted and smooth (and swoon-inducing!)  Whisk in vanilla and butter.  Let cool slightly.

Stand up Popsicle molds.  If you so desire, sprinkle a few mini chocolate chips in the ends, just for shits and giggles.  Pour in slightly cooled pudding.  For even more fun, sprinkle a few more mini chocolate chips in.  They will get melted and pushed deeper in by the stick.  ignore your desire to laugh inappropriately at the previous sentence.  Freeze until firm, unmold and enjoy!

Tuesday, February 21, 2012

CL's Classic Fudge Brownies


I wasn't planning on posting today.  I was actually planning to bust this out tomorrow.  But then I realized that only a bad person posts about fudgy, chocolaty, dense, gooey goodness on Ash Wednesday.  Cool people, on the other hand, blog about it on Fat Tuesday, aka Mardi Gras, aka this day used to mean a chocolate waterfall and bananas fosters in the dining hall and I really miss that.  As it is, my Mardi Gras celebration is looking like a sandwich after some exercising after work.  Don't say I don't lead an exciting life.  Maybe I'll steal some of the chocolate I bought Ben for Valentine's day that he left here... just don't tell him.

The background story here is that this recipe won Cooking Light's Best Chocolate Recipe Ever contest, as seen in their January 2012 issue.  That is 25 years of chocolate recipes my friends, and this here, this was number one.  Those are quite the accolades, and for the most part, it lived up to expectations.  They were intensely chocolaty.  They somehow straddled the line between being immensely dense and gooey, yet somehow ridiculously crumbly.  It probably needed more time to cool in the pan, but this was Valentine's day dessert and dinner was over and we have no patience.  I attempted to cut them into squares and it was a complete failure.  So instead, we ended up fork-fighting over the pan, jabbing dangerously close to each other's fingers to claim clumps of fudgy brownie for ourselves.  And each bite was delicious.

The next morning, once they had cooled, what was left of the brownies cut a little better and maintained their shape, somewhat.  The chunks of dark chocolate were heavenly, extremely hot just out of the oven, but creamy once cooled.  This is where you need to break out some good chocolate, because it is worth it.  Especially if you're giving up chocolate for lent.  Which, in case you forgot, begins tomorrow.

However, despite all my chocolate haze induced praises, I'm not quite sure if they are big green cookbook worthy.  They crumbled a lot, a lot.  Although, the original recipe called for a metal 9x9 pan, which I don't own, so I went with glass and increased the time and temperature, which may have contributed to the crumbliness.  Also, the recipe called for walnuts.  I am a firm believe in the mantra that nuts do not belong in brownies, so I omitted them and you can judge me if you must.  And finally, CL did it's clever little trick to make these brownies healthy.  They call for 20, TWENTY, servings out of a 9x9 pan.  It's like when Pepsi gives you a bottle with 2.5 servings in it.  You know you're drinking the whole thing, don't lie to me.  Just give it to me straight.  Don't expect to get 20 servings out of these, or rather, don't expect to eat only 1 of their servings.  But then remember that today is Fat Tuesday, and that Fat is in the name, and demolishing a pan of brownies is basically to be expected...

CL's Classic Fudge Brownies
Winner in the January 2012 issue

3/4 c. all-purpose flour
1 c. granulated sugar
1/2 c. brown sugar
3/4 c. unsweetened cocoa
1/2 tsp. baking powder
1/4 tsp. salt
6 oz bittersweet chocolate, divided
1/3 c. 1% milk
6 Tbsp. butter, melted
1 tsp. vanillas extract
2 large eggs, beaten

Preheat oven to 350°F.  Spray 9x9 metal baking pan with cooking spray.

In large bowl, mix flour, sugars, cocoa, baking powder and salt.  Chop 3 oz. of chocolate into small chunks.  Toss in flour mixture.  Set aside.  Combine remaining  3 oz of chopped chocolate and milk in small microwave bowl.  Microwave in small bursts of 30 seconds, stirring in between, until chocolate is melted and smooth.  Add melted butter, vanilla and beaten eggs.  Beat well.  Pour into flour mixture and stir until just combined.

Pour batter into prepared pan.  Put into 350°F oven and bake 25-30 minutes.  Brownies are done when a toothpick inserted in the middle comes out with only a few crumbs clinging.  Cool (if you can wait!) in the pan.  Cut into 20 pieces (ha!).  Eat at least 12.  Enjoy!

Monday, October 31, 2011

Cocoa Roasted Pecans


So there I was, sitting there at work on a Thursday afternoon and instead of paying attention to my daily 1 o'clock meeting like I really should be, my mind wanders.  I want to be in my kitchen, making something new, something excited.  On top of that, I am hungry and jonesing for a snack.   So where does my mind wander?  To cocoa roasted nuts, of course.  Isn't that where your mind always wanders off too?

Alright, I admit, it was quite a random thought, but the idea has been floating around my head for awhile, I just never acted upon it.  And as I sat there in my meeting, once again zoning out and day dreaming of food, I realized I didn't really know how I would go about tackling these things.  I didn't think I could take the candying approach I use for my spicy pecans, but that's all I really knew.

Until Thursday afternoon, during my break of course, when I ventured online to take a peak at how other's had accomplished cocoa dusted nuts.  And I found 3 new blogs that seemed to have a handle on it, each with their own spin on it.  So I did the only reasonable thing: between the different recipes, what I knew I did and did not have at home and my own special brand of logic, I hodge-podged together my own recipe. 

And surprise of surprises, my recipe mojo must have been pumping full blast on Thursday, because these are fantastic.  Really fantastic.  I, of course, will attribute it to my magical recipe combining skills, but you're more than welcome to attribute it to the fact that cocoa + sugar + toasted nuts = really yummy, snacky, healthy goodness.  Really, what more could you ask for?  Oh wait, did I mention that they will make your kitchen smell wonderfully chocolaty and spiced and warm?  And that they taste a little bit like Christmas in your mouth?  And that they come together very quickly and easily?  And that if I could make these with only what I have sitting in my pantry, then so can you?  Cause really those are all very valid points.

Anyways, silliness aside, my batch was purely pecans, but I stocked myself up on other assorted nuts this weekend at Costco to make myself a mix batch (almonds, pecans, cashews) just as soon as I go buy more eggs for my fridge.  In my head, I have great images of myself cooking up several batches and making them pretty in nice jars with ribbons and Christmas bows to give away, but we'll see if that actually happens.  If nothing else, I plan to bring a load home for Thanksgiving to share, but that's a few weeks off as well, so really, I can't promise anything.  Or in other words, stop waiting for me, you'll be much happier the sooner you make these for yourself.

Cocoa Roasted Pecans

3 c. pecans
1 large egg white
2 tsp. vanilla
1/3 c. brown sugar
2 Tbsp. unsweetened cocoa powder
2 tsp. cinnamon
1/2 tsp. salt


Preheat oven to 300 degree F.  On rimmed baking sheet lined with parchment paper, spread out nuts.  Roast in oven for about 10 minutes or until nuts are fragrant.

While nuts are roasting, whisk together sugar, cocoa, cinnamon and salt.  Set aside.  In larger bowl, whisk egg white and vanilla until soft peaks form.  Gently fold in sugar mixture.  Fold in roasted nuts and stir gently until nuts are completely covered.

Spread nuts back onto baking sheet lined with parchment paper evenly.  Roast for 30 to 40 minutes, stirring every 10 minutes or so.  Let cool and store in an airtight container.

Wednesday, September 21, 2011

Chocolate Buttermilk Loaf


I have no story.  No cute anecdote or funny past memory.  I always feel like I have to have a story or some lead in or something.  But nada.  I thought about it all day, but I couldn't even make up a decent one.  I do have pictures.  At each step of the way.  I had hoped that I would have better pictures, but I do what I do with my little Sony point and shoot.  So, tonight, you get pictures.  


I suppose there is a little back story.  Like I went up to Notre Dame this weekend for the football game (And we won!  Woohoo!  Go Irish!) and I was staying with my friend Tara (remember her?) and I didn't want to show up empty handed.  And I have been wanting to make this cake for awhile, which of course comes from my blog crush, Deb.  And, well, that's it.  Thus chocolate buttermilk loaf came into our lives.


Everyone was a fan.  Granted, what is there not to love about a dense chocolate loaf cake?  It was thick, which probably doesn't sounds appealing, but it was.  And crumby, yet moist.  It wasn't exactly what I thought it was going to be, but it was delicious.  I wish I had eaten it warm out of the oven, but it had to travel with me, so it had to wait.  And it was good once we broke into it, and even better the next morning for breakfast.  


I had thought about adding a teaspoon of cinnamon or so to the batter before baking.  Thought about it all day long.  But then again, when don't I think about adding cinnamon?  And then there I was and the batter got foamy and into the pan it went and I admit it, I forgot.  Probably cause the batter got kind of foamy and it took me by surprise, so don't let that take you by surprise.  And think about maybe adding some cinnamon.  Wow, this post ended up longer than I thought.


Ben thought this picture would be the bomb.  I will admit, it turned out cooler than I thought.  And this is now the end of the story that's not really a story.  So get baking!

Chocolate Buttermilk Loaf
1/2 c. unsalted butter, room temp.
1 c. packed light brown sugar
1/2 c.  granulated sugar
1 large egg, at room temp
1 c. buttermilk
1 tsp. vanilla extract
1 1/2 c. all-purpose flour
3/4 c. cocoa powder (see Deb if using Dutch cocoa powder)
1/2 tsp. baking soda
1/4 tsp. salt
Preheat the oven to 325°F.  Butter and flour loaf pan.

In large bowl, cream butter.  Add brown and granulated sugar and cream together until fluffy.  Add egg and beat well.  Follow with buttermilk and vanilla, beat well.  "Don't worry if the batter looks a little uneven", even kind of gritty.

Into same large bowl, sift flour, cocoa, baking soda and salt.  Mix together until well blended, but don't over mix.  Pour batter into prepared loaf pan.

Put in oven and bake for 60 to 70 minutes.  To check doneness, insert toothpick into center of loaf, it is done when the toothpick comes out clean.  Remove from oven and let cool in pan, on rack, for 15 minutes.  Remove from pan and let cool, or serve warm like I wanted!

If you add cinnamon, please let me know how it turns out!  I'm dying to find out.

Wednesday, August 17, 2011

No Bake Cookies

And now we return to our regular scheduled blogging... well, sort of. 

Here again is a wonderful example of one of my birdwalks as well as another of mom's recipes and childhood favorites.  I think it is more than fair to say that quite a few recipes in my big green cookbook, both now and I'm sure more in the future, are really stolen from my mother's assortment of recipe cards, cookbooks and own pile of random clippings, contained in a large danish butter cookies tin.  I have lots of good memories associated with her well-worn, orange Betty Crocker cookbook and the gray Mead notebook she still has that was once my great grandma Esther's.

This recipe is your run of the mill generic no bake cookie recipe.  There are no frills, nothing special or surprising.  But is the same recipe my grandmother makes every Christmas and the cookies my mom would finally concede to make for us when we begged for cookies in the middle of August in Arizona.  It's good, if for no other reason it reminds me of being 7, during Christmas and eating nothing but no bake cookies and bird's nest for dinner.


Short post, crappy pictures, sorry!  It's been an off week or so.  I hope to come back strong and with vengeance in the very near future.  As in this weekend.  With any luck, we'll have a guest chef in the kitchen too!  I'll get back with you soon.

 No Bake Cookies

½ c milk
½ c butter
2 c sugar
1/3 c cocoa
3 ½ c oatmeal
½ c peanut butter
Coconut (about 1/4-1/2 cup)
Vanilla (about a teaspoon or two)

Boil milk, butter and sugar on slow heat for one minute.  Remove from heat, stir in cocoa and peanut butter.

Mix in remaining ingredients.  Drop by the rounded tablespoon onto wax paper.  Cool.

Monday, June 27, 2011

Slice-and-Bake Chocolate Cookies


Although I follow a few different food blogs out there in the blogosphere, my absolute favorite food blogger is Deb, over at the smittenkitchen.com.  Her writing is engaging and witty, she's incredibly informative, and on more than one occasion, her pictures have made me want to lick my computer screen.  So far I have been able to resist the urge, but just barely.


With that said, it is a little shocking that I haven't actually tried a recipe from her vast archive.  Even more shocking when the smitten kitchen is behind the majority of recipes on my online Recipes to Try list.  I finally put an end to my holding out this weekend with her Slice-and-Bake cookies, a recipe adapted from Dorie Greenspan.  Unfortunately, for my first of many recipes from the site, they didn't quite blow my mind as I had been hoping, although I will chalk that up to my lack of imagination and ingredients, rather than a faulty recipe. 

Deb gives a good little laundry list of possible variations for this slice and bake, many of which I want to eventually try.  I do love how simple yet adaptable the dough is and the idea that you can keep a log or two in the freezer and at a moments notice pop out a few dozen cookies.  I went with the chocolate because I didn't want to make just plain cookies and I really didn't have anything in my pantry (which at that point was residing pre-move on my dining room table...) to mix-in.  The batter itself was yummy, although you could taste the flour, something I had hoped would cook out.  The final cookie was good, it just wasn't exciting in any way.  It lacked a little bit of sweetness and some chocolatey goodness, both issues I think could have been easily resolved with the addition of some chopped semisweet chocolate goodness.  Seeing as there is a multitude of ways to adapt the cookie, it's safe to say that in the near future there will be a repeat.  Or at least a frozen log in the freezer...

I'm moving!  So please excuse any lack in cooking and posting.  In my heart, I have one more post in me before leaving South Carolina, but my head would like all of it's cleaning deposit back, so we'll see what the outcome of that battle is.  If you don't hear from me until I'm in Indiana, I'm sorry!  But that just means I'm getting ready for new adventures in a brand new (to me at least) apartment kitchen.


Slice-and-Bake Chocolate Cookies
borrowed from smittenkitchen.com

makes about 50 cookies

2 sticks unsalted butter, room temp
2/3 c. confectioners’ sugar, sifted
2 large egg yolks, room temp
Pinch of salt
1 tsp. vanilla extract
1 3/4 c. all-purpose flour
1/4 c. unsweetened cocoa powder

Although the recipe calls for doing this in an electric mixture, my KitchenAid was already clean and packed away, so I preceded by hand, maybe another reason my cookies weren't as stellar as I hoped.  I summarized the smitten kitchen instructions below:

Using the paddle attachment, mix butter at medium speed until smooth.  Add sifted confectioners' sugar and continue to beat at medium speed until butter and sugar is smooth and silky.  Beat in egg yolks and salt.  If adding any mix-ins, do so now.  On low speed, add flour to mixture, beating until just incorporated.  It's better to underbeat than overbeat and it is ok if the flour isn't fully incorporated.  Divide dough in half and form into balls; wrap each in plastic wrap.  Refrigerate for 30 minutes. 

On a smooth surface, take each ball and work into a log, about 1 to 1 1/4 inches in diameter.  Rewrap each log in plastic wrap and chill for at least two hours.  Batter can be stored, ready to bake at this point, in the fridge up to 3 days.  Additionally, it can be frozen at this point for up to a month.

Preheat oven to 350°F, line two baking sheets with parchment paper. 

Remove logs from fridge and using a sharp knife, cut log into cookies about 1/3 inch thick.  Try as best as possible to keep thickness consistent.  Put cookies on baking sheet with around half an inch of space in between; they will expand.  Bake for 10-14 minutes.  Cookies should be set, but now browned.  Transfer to a wire rack to cool to room temperature.  For storage, put cookies in an airtight container.

Make sure to head on over to smittenkitchen.com to check out a list of fun variations!