Showing posts with label BGCB. Show all posts

Wednesday, September 25, 2013

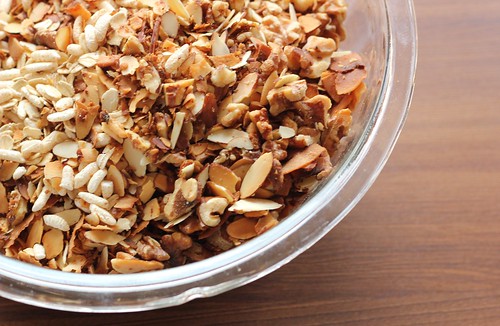
Lizbar's (aka Homemade Power Bars)


Ben takes the GRE today.  I am so excited, anxious, proud and nervous for him - all rolled up in one crazy little bundle.  I am both eager and on edge.  And I'm not even taking the damn thing.  I don't even know how he is managing.   Actually, he's probably managing a lot better.  He's a little less excitable than I am, and on top of that, he has more than prepared.

I am very proud of him and how he came at studying for the test.  It has been a long time in the making.  He has been extremely dedicated, carting his studying material (including the 5 pound book of questions!  Which, title aside, actually weighs closer to 6 pounds) to each of our last 3 vacations.  Making time to study while I go play with our nephew or nap in a hammock.  Spending many weekend afternoons tucked away in the spare bedroom or studying in the car while I drove.  He has been beyond committed, and I find myself constantly impressed and beaming with pride.
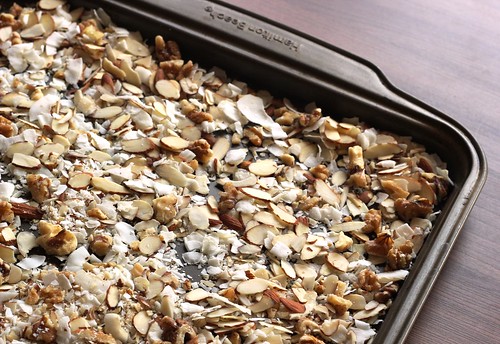

If I were a fiance that was a little more on top of her stuff, this is the exact snack that I would have made for Ben to eat right before the test.  Overloaded with nuts, whole grains (yay for oats!) and just enough espresso powder to give you a little jolt, I imagine they are great kick-butt-on-standardized-tests food.  Unfortunately, I am not the fiance that's on top of her stuff, so luckily for me, they also work great as pre-gym snacks as well.  So that is what Ben is getting for finishing his test - a large batch of Lizbar's, made with love, to help him ease his way back into the gym rat he misses being.


So, today I sit at my desk in Rockford, anxiously tapping my foot, knowing that this is something completely out of my control.  And it will drive me nuts until I get that long awaited call this afternoon to tell me he is done and that he did great.


Lizbar's (aka Homemade Power Bars)
Adapted from 101 cookbooks

These are also fabulous for those afternoons that at 2 PM you can't imagine staring at a computer anymore.  They are lightly sweet, have just the right small bit of caffeine and, if you add chocolate, just about perfect for giving your behind the little swift kick it needs to get you through the day.

The recipe is very adaptable.  Add whatever nuts you want or have on hand.  Throw some seeds in there too, if you'd like.  Add some dried fruit if you get the feeling.  And, really, you can't go wrong with a few mini chocolate chips sprinkled on top.

Lastly, I usually use my 9x13 pan for this.  It makes thinner bars, similar in size and thickness to a Clifbar.  If you like yours thicker (think size and thickness of a Quaker Chewy bar), go for a 9x9.

Coconut oil, for greasing
1 c. walnuts, chopped
1 c. chopped almonds
2/3 c. unsweetened shredded coconut
1 1/4 c. rolled oats
1 1/2 c. unsweetened crisp brown rice cereal
1 c. brown rice syrup
1/4 c. natural cane sugar (sugar in the raw)
1/2 tsp. kosher salt
2 Tbsp espresso powder
1 tsp. pure vanilla extract
1/4 c. mini chocolate chips

Preheat your over to 350.  Generously grease a 9x13 pan with coconut oil and set aside.  On a rimmed baking sheet, toss walnuts, almonds and coconut.  Toast in the over for 5-7 minutes, until coconut is golden.  Toss a few times to avoid the nuts and coconut burning.

In large bowl, combine toasted nuts, coconut, oats and cereal.  Mix well.  It is easier to evenly distribute the ingredients now, then it will be after pouring the syrup over them.

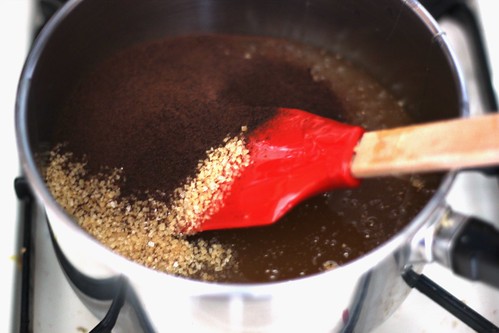
On the stove, in a large saucepan over medium heat, combine the wet ingredients (brown rice syrup - vanilla).  I find it easiest to handle/measure/pour the brown rice syrup if I heat it up for a few seconds in the microwave first.  Bring mixture to a slow boil, stirring constantly.  Continue to cook, while stirring, another 4-5 minutes, until the syrup thickens slightly.  Remove from heat and pour over nut/oat mixture.  Stir (slow and gentle!), until syrup covers the nuts and oats completely.

Pour into prepared pan and lightly push down.  Wait a few minutes for mixture to cool, then sprinkle chocolate chips on top and lightly push into bars.  Let cool to room temperature (a few hours).  Flip out onto cutting board and cut into 16-24 bars.

Saturday, September 21, 2013

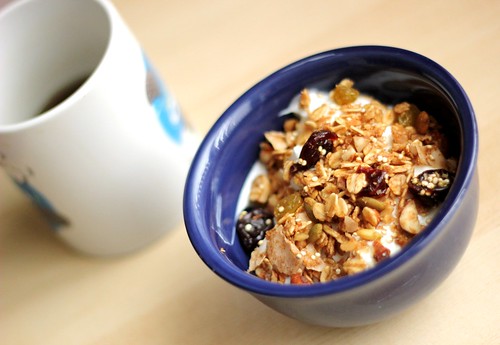
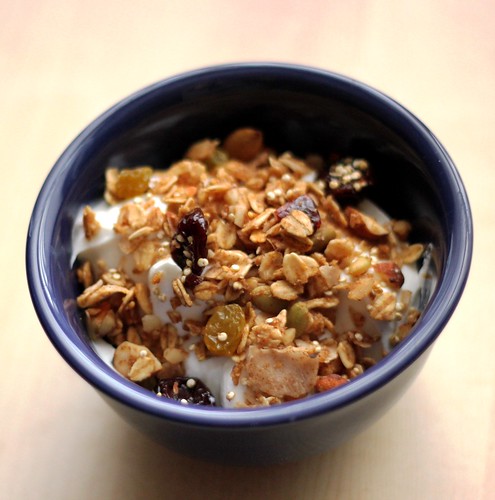
Coconut Quinoa Granola


I wanted to thank you guys for letting me enter wedding mode last post.  But I feel I should warn you, it was only the tip of the iceberg.  And now the ice has broken and something I tried to keep away from this space has come into it anyways.  And let's face it, it won't go away.  Besides, the way I was keeping it out of this space was by physically not being in this space as well, which was not as much fun for me.  So, now the two world's shall collide.  Wedding planning and food.  Registries and recipes.  Guest lists and granola.

I am nothing if not a master of smooth lead in's...


I am a firm believer that something made from scratch in your own kitchen is certainly better for you than the store bought equivalent.  Homemade chocolate chip cookies must be better for you than Oreo's and are certainly better for me than the bag of Twizzlers pull and peel's that I have hidden in my desk at work.  Yes, you need butter to make your cookies taste good, but at least there is not Red 40 added to it.  And I figure that counts for something.

The jury is still out on if this theory holds any truth or not, but I would venture to say that when it comes to the case of granola, homemade just has to be better for you.  Or at least that is what I'm telling myself as a repeatedly chomp on handfuls of this stuff.  Yes, there is oil and sugar and what not.  But I put it in there, so it must be better... Thank heavens I don't have to worry about a wedding dress fitting for at least a few more weeks.

And with that, we have come full circle.  Now it is time for me to peace out, for today?  Today is cake tasting day!!


Coconut Quinoa Granola
Adapted from Sweat Pea's Kitchen

This is a quick, easy recipe and was immediately inducted into the big green cookbook.  The great thing with most granola recipes is that it is a rough guideline.  Use whatever dried fruit you have on hand - blueberries, tart cherries (a personal favorite).  Use whatever nuts as well.  Just go with what you are feeling.

3 c. old fashioned oats
1/2 c. quinoa (uncooked)
1/4 c. wheat germ
1/4 c. pepitas (pumpkin seeds)
1/2 c. chopped almonds
1/2 c. shredded, unsweetened coconut
1/2 c. brown sugar
1 tsp. cinnamon
1/4 tsp. kosher salt
1/4 c. honey
1/3 c. coconut oil
1 tsp. vanilla extract
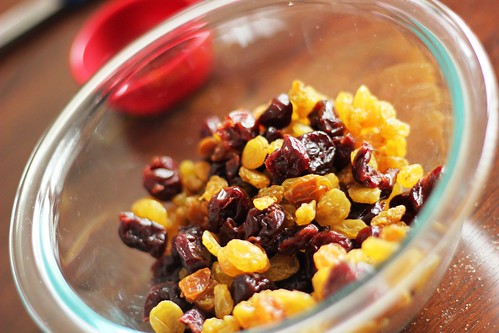
1/2 c. dried cranberries
1/4 c. golden raisins

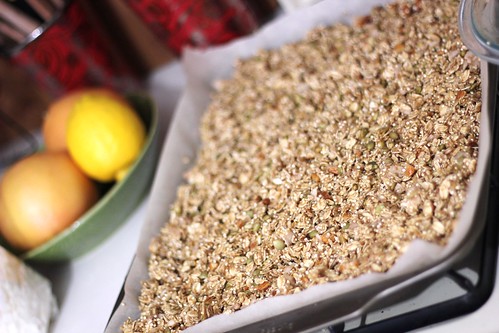
Preheat oven to 300 degrees F.  Line a rimmed baking sheet with parchment paper.

Combine first 9 ingredients (through salt).  Spread evenly over baking sheet.  In small bowl, melt coconut oil.  Whisk in honey and vanilla extract until smooth.  Pour over oat and nut mixture.  Toss until oats are coated, then spread flat on baking sheet.  Bake at 300 for 30-40 minutes, until granola is a light golden brown.  Toss at least 4 times, to ensure granola does not get burned in spots.

Once golden brown, remove granola from oven and add cranberries and raisins.  Toss to combine.  Let cool.  To store, keep in airtight containers.
Thursday, April 11, 2013

Beer Braised Carnitas


I got a little super nerd excited when I noticed that this post was number 144.  Why?  Because that is 12 squared.  Not that 12 has any real meaning for my either, I just think 144 is a pretty cool number.  Yeah, I am a dork.  One of my favorite books is Fermat's Enigma.  The college essay I wrote that got me into Notre Dame?  Completely 100% based on my love of math.  I am still absolutely certain that that is the reason I got accepted.  I just really like math.  Hopefully that wasn't too much of a weird insight into how my somewhat nerdy brain is wired, that's just what popped into my head as I opened up this post, so I decided to share... Anyways, on to why you are really here, the carnitas!


There are occasionally times when I feel like I let my last name down.  I am Mexican.  Alright, I am a quarter Mexican.  But even so, I always feel a twinge of guilt when I reach for a jar of salsa, especially when I have my great-grandma Tilly's recipe sitting in the homemade cookbook on the counter.  Which is, I will admit (oh, the guilt!), ridiculously easy to make.  When I am feeling particularly shameful about my cultural negligence  I usually make Ben take me to the local taquerio where I can find a little solace in ordering a proper Mexican taco (corn tortillas, none of this cheese, sour cream, lettuce nonsense, simply topped as it should be with diced white onion, cilantro and a hearty squeeze of lime).


Other days, things are little more drastic, and I can go no longer with besmerching my good Mexican last name.  Call me a drama queen if you will, but good things usually come from these drastic measures.  Good things like corn tortillas.  And, most recently, these carnitas.  These heaven sent, lightly spicy, fall apart melt away goodness, carnitas.  Now, this is something my one quarter Mexican self can be proud of, just please ignore the fact that I did use store bought corn tortillas...


Beer Braised Carnitas
Adapted, in words only from Feb. 2013's Bon Appetit

There are 2 things you should take away from this recipe.  One is that carnitas, of any type, are usually  straight forward and easy.  There are only 5 ingredients!  Here's the gist: you take some pork, cut it up and boil it all day long until it melts apart.  Then you brown it in the very same pot after all the liquid evaporates.  For 20 minutes of prep work and a few hours on the stove, you get a pot of gorgeous, red, flavorful meat.  Two?  This is jaw-droppingly delicious.  Big Green Cookbook approved.

2 dried New Mexico chiles
4 lbs. skinless, boneless pork shoulder, cut into 2 inch hunks
12 oz lager (I used Modelo Especial)
4 garlic cloves, crushed
4 tsp. kosher salt

In large dutch oven, over medium heat, toast the chilies on both sides, until they have puffed up and darkened, about 2 minutes.  Remove from pot and let cool.  Once chilies are cool enough to handle, cut in half long ways and discard the stem and seeds (the more seeds you leave in, the more spice you'll find your dish has).  Return to dutch oven and add all the remaining ingredients, plus 1 cup of water.  Bring to a boil, then reduce the heat to a simmer.  Cover the pot and let simmer, stirring occasionally, until pork falls apart at the touch of a fork.  This took me about an hour and a half.

Once the pork is fork tender, remove the lid of the pot and raise the heat slightly, bringing the liquid to a slow boil.  Stirring occasionally, continue to boil until the liquid evaporates completely, about 25 minutes.  Using a wooden spoon, continue to allow pork to brown (it will naturally start shredding apart).  Stir continuously and scrape up the browned bits of goodness from the bottom for another 10-15 minutes.

Finally, add about 1 cup of water to the dutch oven.  Bring to a boil and scrape up any remaining browned bits of goodness from the bottom.  Serve with corn tortillas and a smile!

For instructions on making ahead of time (up to 3 days!), see BA's website.

Thursday, January 10, 2013

Avgolemono


Hi... it's me.  Remember me?  It's ok if you don't.  I sort of ran away and hid for awhile.  Things were falling and I didn't bother to take the time to pick them back up.  I did come back once simply to tell you I was alive.  Does that count for something?

I hope you haven't completely written me out of your book yet.  I have new things to share, I promise.  Are any of them recipes, you may ask.  Which is a fair question, seeing as this is some sort of an excuse for a cooking blog.  And I'm hear to tell you that at least one of them is!  And it's perfect for right now, when all of us are fighting one type of sickness or another.  Soup.  The only kind of soup you want when you're feeling achy and cold and you have an elephant sitting on your chest.  There is an elephant sitting on your chest too, right?  Or is that just me?

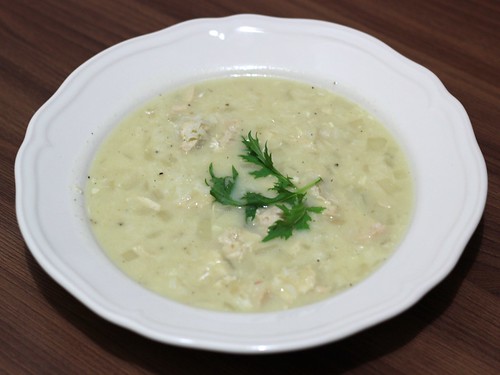
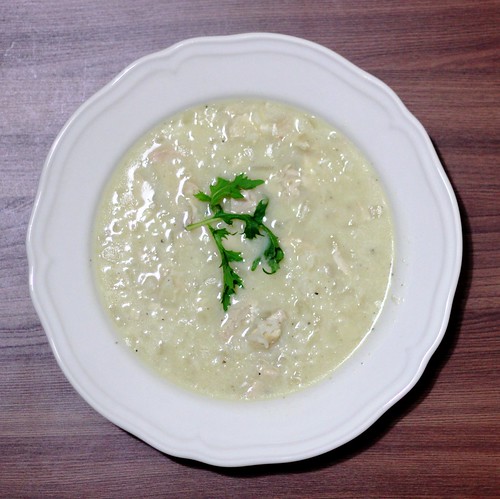
It is chicken soup.  Chicken soup made creamy by the slow addition of an egg and almost impossibly bright by the swirl of fresh lemon.  It is chicken soup that is easy to make, requiring nothing out of the ordinary and no extra work, especially if you have a bag of shredded rotisserie chicken in your freezer.  It is chicken soup that will calm your nerves, warm your tummy, and if we are lucky, help beat up all this icky sickness around us.


This is the way that we're starting a new year.  With a new soup and an easy addition to my big green cookbook.  Oh, and with some other exciting news.  There happens to be this very shiny, very, very pretty ring thingy hanging out on my left hand.  It's a little strange and I'm not quite used to it yet, but it puts a huge smile on my face every time I look at it.  Yes folks, we're engaged.  Things are about to get all sorts of real.

Avgolemono
Adapted from Cooking Light, January 2012

1 Tbsp. extra virgin olive oil
1 medium onion, chopped
3 garlic cloves, minced
6 1/2 c. chicken stock
1/2 c. uncooked long-grain rice
1/3 c. fresh lemon juice (~ 2 lemons, depending on their size)
2 tsp. cornstarch
1/2 tsp. salt
1/2 tsp. black pepper
1 large egg
2 c. (8 oz) chicken breast, shredded

In a Dutch oven over medium high heat, add oil and heat until it begins to shimmer.  Add chopped onions and garlic.  Saute 2-3 minutes or until fragrant.  Add chicken stock and bring mixture to a boil.  Add in rice and reduce soup to a simmer.  Summer for 16 minutes, or until rice is just a few minutes before done.

Meanwhile, combine lemon juice, cornstarch, salt, pepper and egg.  Whisk together well.  Once soup/rice mixture is ready, very slowly pour lemon juice mixture into soup, gently whisking the entire time.  Be patient and careful, you want the egg to incorporate, not scramble!  Add in chicken and stir.  Let lightly simmer until soup thickens and rice is done, about 305 minutes more.

Sunday, November 18, 2012

Maxine's Turkey Dressing


I'm going to have to ask for your forgiveness here for two reasons. But then hopefully I can give you a recipe that should more than make up for my blogging transgressions.

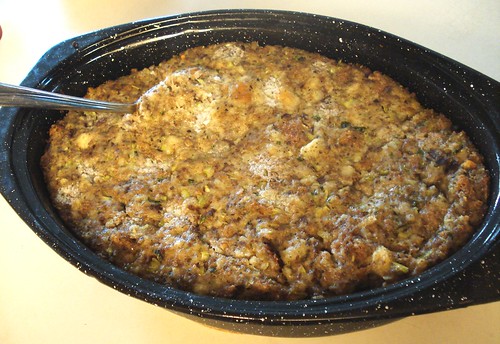
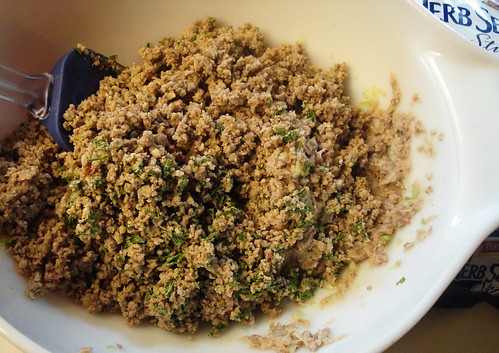
The first thing I need forgiveness for is these photos.  They are not appetizing.  The reason behind this is also two-fold.  Stuffing/Dressing, very much like chocolate dough, is not an appetizing thing to photograph, at least not for an mature photographer like myself.  It either ends like it came out of the back end of a donkey or the front end of a dog.  In other words, not pretty.  Secondly, these pictures were taken with my good, old, trust Sony Cybershot, which has since given up it's life.  (It will always be loved, never forgotten).  Good little camera, but luckily I do have better now.  And this leads me to the second reason I am apologizing.

This recipe is just short of a year old.  Eek.  I'm sorry, I really am.  But really, who wants a dressing recipe after Thanksgiving?  Especially one that involves giblets...  If it makes you feel any better, it's been driving me nuts that I haven't been able to share this with you for almost a year.  But, finally, the magically, wonderful time that is known as Thanksgiving is here.  And here is the dressing that you should make.  And should you feel the need to thank me afterwards, well, I won't turn it down.


It has been a year since I've tasted this dish, but I do remember some things.  To start out with, it is delicious.  I am not a fan of Stove Top, and if you aren't either, than this is the dressing for you.  Also, this will take some time, not much, but enough to stress you if you're reading the recipe for the first time on Thanksgiving day.  Read the recipe once or twice before the grand day; it will help a lot.  Then just make sure you budget your time as needed.  Last thing, it is totally ok to be afraid of giblets.  I was and I'm pretty sure I still am.  Hopefully, you have a wonderful mother like mine to walk you through handling them and tell you not to freak out because they look funny and you have to stick you hand up a bird's yoohoo to get them.  And hopefully that wonderful mother makes you do it too, because that's a girl-turned-woman kind of moment right there.

Don't wuss out.  Stick your hand up the bird and grab the damn giblets.

(That is by far my favorite sentence ever on this blog).


This has been pasted in the BGCB since last November.  It is tried, it is true, and if you still need a dressing for your table this Thursday, well, this is it.  Enjoy!  And good luck with the giblets.

HAPPY THANKSGIVING!!

Maxine's Turkey Dressing
From BA November 2011 issue

I normally type each recipe, especially the directions, in my own words, to show you how I interrupted them, what I did, etc.  Since it's been about a year since I've made it, I don't really remember any of the specifics.  Therefore, below is Bon Appetit's recipe, word for word, from their website.  The link is below the title.  Therefore, all credit goes to them.


1 bag turkey giblets
1 turkey neck
4 celery stalks, coarsely chopped, divided
1/2 cup celery leaves
3 sprigs flat-leaf parsley, plus 1/3 cup leaves
8 black peppercorns
1 bay leaf
3 tablespoons unsalted butter, cubed, plus more
1 pound breakfast sausage, casing removed
1 12-oz. bag Pepperidge Farm Herb Seasoned Stuffing
Kosher salt and freshly ground black pepper

Combine giblets (reserve liver), neck, 1 chopped celery stalk, celery leaves, parsley sprigs, peppercorns, and bay leaf in a saucepan. Add 6 cups of water; bring to a boil. Lower heat; simmer for 30 minutes. Add liver; simmer until broth measures 4 cups, about 30 minutes longer. Strain; reserve broth. Pick meat from neck and chop giblets; set aside.

Preheat oven to 350°. Butter a 2-qt. baking dish. Cook sausage in a large skillet over medium heat until cooked through, about 10 minutes. Chop parsley leaves and remaining celery in a processor. Add neck meat, giblets, and sausage; pulse just to combine. Transfer to a large bowl; add stuffing mix. Add turkey broth by 1/2 cupfuls, mixing until moist but not wet. Season with salt and pepper; transfer to prepared baking dish.

Cover dish with foil. Bake until heated through, about 40 mintues. Uncover dot with butter and bake until browned, about 20 minutes longer.

Saturday, November 10, 2012

Roasted Acorn Squash with Walnuts and Cranberries


Work is kicking my ass.  And from what I've been told, it's not going to let up until the new year.  Part of it is my fault.  I signed up for a lot.  I could try to defend my decision to help out and stretch myself thin, but I have tried.  I just sound whiny.  I'd rather not sound whiny.  Let's just say, work is kicking my ass and I'm having trouble finding the bright spot on the horizon.

So life after work, what very little life I do have after work, has been subdivided into mini-sized goals.  Make new food, but make it fast, easy and simple.  Don't let home become a mess and laundry back up, because that's a hole I don't have a weekend to spend digging out of it.  Enjoy what is left of fall, because (and it pains me so to say this, but...) one day soon I'm going to blink and there will be snow outside.  Snow.  Do you see what we are up against here people?  It's daunting and we need solutions.


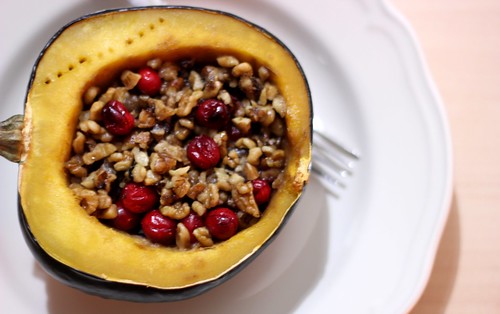
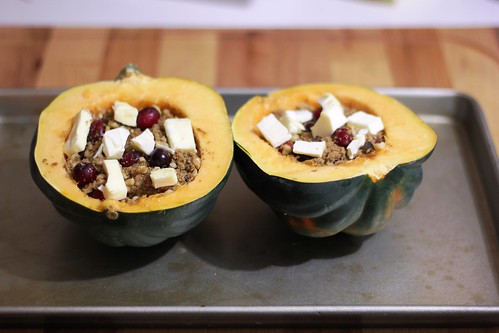
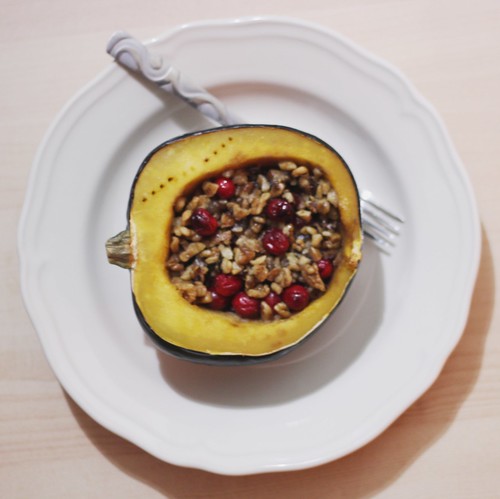
Luckily, I found at least one solution to my mid-November stress out.  Acorn squash that has been roasted with walnuts, cranberries, brown sugar and just the cutest little pat of butter.  In that one sentence, I not only described what I would consider to be a legitimate and delicious weeknight dinner, but the dinner that's going to save you from forgetting the wonders of fall.  It's quick, has five ingredients and takes minutes to throw together.  While it's roasting you will have time to start that load of laundry, empty the dishwasher and vacuum the living room.  Plus, your nose will be serenaded with the smells of fall the whole time.  Because squash and brown sugar are basically building blocks of fall.  Plus, it hits all your food groups: squash—vegetable, cranberries—fruit, walnuts—protein, butter—dairy, sugar—sugar!

Sugar is part of the food pyramid, right?  It's at the very top, so that must mean it is the most important.  Right??  That's my story and I'm sticking to it.


Roasted Acorn Squash with Walnuts and Cranberries
Adapted from Let the Baking Begin!

This is absolutely a BGCB member.  I was simply in love with how quick, easy and delicious the recipe turned out.  To be honest, the full recipe (reflected below) is just a tad bit decadent.  Don't get me wrong, I loved it as it was, but for every day use, I would scale back the walnut/cranberry/sugar mixture.

1 acorn squash
1/2 c. walnuts, coarsely chopped
1/2 c. frozen cranberries
4 Tbsp. dark brown sugar
2 Tbsp. butter

Preheat oven to 375.  Get out a rimmed baking sheet.  If you are afraid of spillage, line with aluminum foil.

Cut squash in half length wise.  Using a large spoon, scoop out inside "guts" and seeds, discard.  In small bowl, toss walnuts, cranberries and brown sugar.  Divide among squash halves equally.

Using 1 tablespoon of butter for each half, dot walnut/cranberry mixture with butter.  Move squash to baking sheet and tent loosely with foil.  Roast squash 1 hour and 15-20 minutes, or until a fork inserted into the flesh goes in easily.  Remove from oven and enjoy hot!

Wednesday, October 31, 2012

Poached Eggs in Tomato Sauce with Chickpeas and Feta


I'm not going to lie.  The only thing on my little blogging mind right now is this book.  Just to be even more up front and honest, I preorder this book back in March.  MARCH.  As in 7 months ago.  And I have ever so eagerly (and patiently, I swear!) been awaiting it's arrival.

So of course, Amazon won't have it here till Friday.  And so-help-me-dear-blogosphere, if it is not here by Friday, I may snap.  I cannot wait a second longer.  People already have it and it is JUST NOT FAIR!

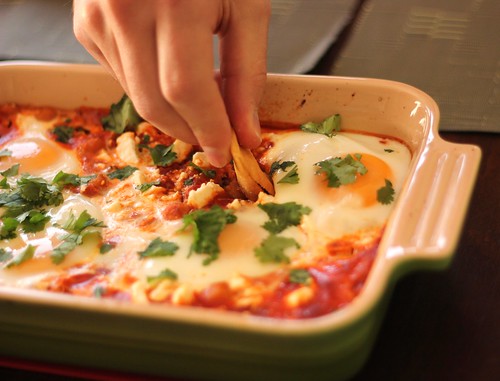
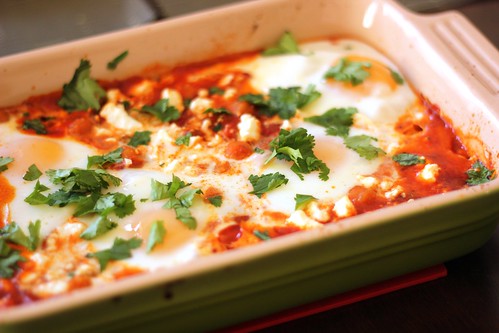
So, if you don't mind, I am going to excuse myself to go pout in the corner until Friday's mail comes.  I will leave you with a pretty little photo-montage of this absolutely fantastic breakfast.  It may look like eggs, dipping sauce and pita chips, well because that is what it is, but don't let that fool you.  It is very filling.  Ben and I had this on Saturday and didn't really have another meal to dinner.  It is protein-loaded, saucy, cheesy, dip-able goodness.  It should be your weekend breakfast.  That you eat while reading Deb's cookbook.  (I'm sorry, I'm obsessed, it is literally all I am thinking about).


It took roughly a few hours on Saturday before this was pasted lovingly into the big green cookbook.  I made the recipe in full (serves 4-6) all the way up till the very end.  I baked half the sauce with 4 poached eggs and the rest of the sauce is in my freezer for a rainy (or more likely, snowy) day.  When I thaw it out, I will let you know how well it froze!

Ok, I'm off to wait grumpily (oh, wait, I totally meant patiently...) for Friday.  So I can super heavy crush on Deb some more.  Enjoy!  PS - HAPPY HALLOWEEN!

Poached Eggs in Tomato Sauce with Chickpeas and Feta
from the Dec. 2011 issue of Bon Appetit

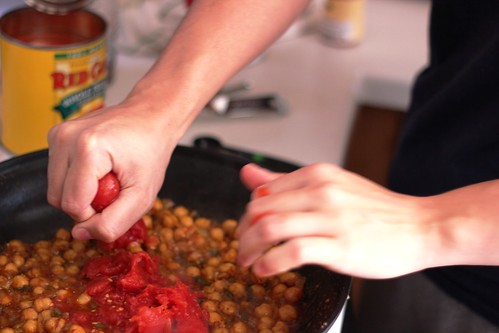
Again, this will feed 4-6.  Because the recipe didn't really halve well (what do you do with a half can of chickpeas?), I made the whole batch of sauce then split in two.  1 morning of work, 2 amazing breakfasts!  Also, watch out as you are hand crushing those tomatoes.  As both Ben and my poor camera found out, they tend to have quite a bit of juice to squirt!


1/4 c. extra virgin olive oil
1 medium onion, finely chopped
4 garlic cloves, coarsely chopped
2 jalapenos, seeded, finely chopped
1 15-oz can chickpeas, drained
2 tsp. Hungarian sweet paprika
1 tsp. ground cumin
1 28-oz. can whole peeled tomatoes with juice
Salt and pepper
1 c. feta, crumbled
8 large eggs
Handful fresh cilantro, chopped
Pita chips to dunk

Preheat oven to 425.

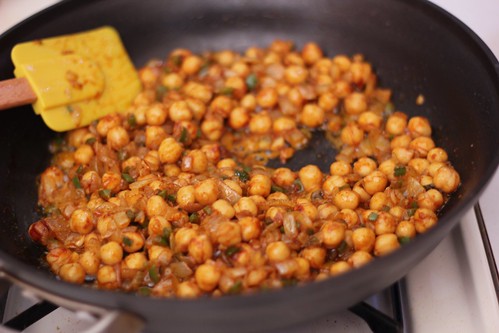
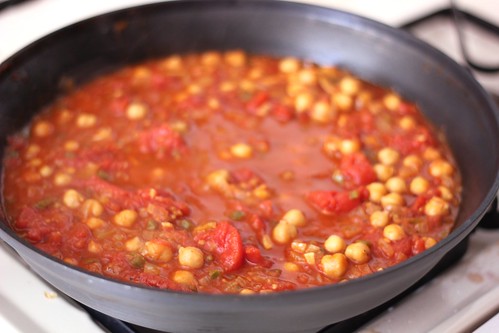
In large skillet, warm oil over medium high heat.  Add onions, garlic and jalapenos and saute until onion is soft and translucent, 5-6 minutes.  Add chickpeas and spices and continue to cook another 2 minutes.

CAREFULLY hand crush the tomatoes over the pan, doing your best to capture all their juice.  Add remaining juice in the can and bring the mixture to a boil.  Reduce heat and simmer sauce 15 minutes or so, until it has slightly thickened.  Do a taste check and adjust seasoning as necessary with salt and pepper.

Transfer sauce to an over-proof dish (if you are making into two meals, split here!).  Sprinkle feta evenly over top.  Using a spoon, dig little rounds for each egg in the sauce.  Carefully crack each egg into each hole.  Bake in 435 oven for 6-8 minutes to set the whites of each egg, but do not overcook!  You want the yummy, runny yolk!  Sprinkle cilantro over top and serve with pita chips to dip!

Monday, October 1, 2012

Almendrados


Have you ever blanched an almond? It's a quizzically satisfying chore to do. And easy too.  An old ex-boyfriend actually taught me the trick. You bring whole almonds to a rolling boil for a few minutes and then drain them. After they cool for a few minutes, you pick up your first almond victim and simply pinch.

With a wet, gratifying slurp, pffft they come popping out of their skins, naked as a brand new baby. You are left with a wet, empty skin and a freshly peeled almond. Just perfect for making almondrettos with.

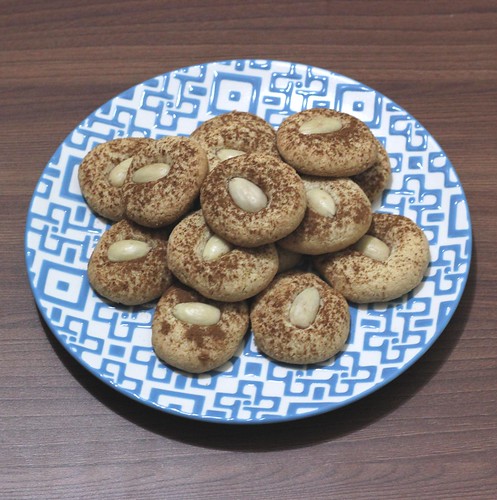
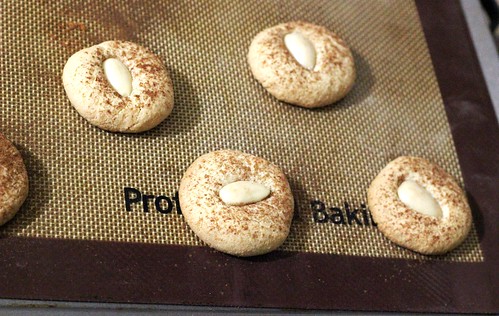
If that description alone doesn't send you running to the kitchen to put some almonds on to boil, maybe the deliciousness of these cookies will. They are almond through and through, soft and a little chewy when fresh out of the oven; hard, crunchy and biscotti-esque after just one day. They are beautifully, lightly scented with cinnamon that roasts atop while the cookies below bake to a golden hue. And just a little bit of lemon adds the perfect contrast to an almond screaming cookie.  Maybe I am romanticizing a little bit here, but that's just my mood tonight.  Nothing wrong with a little food love, right? And if it leads to a little bit of almond peeling/popping/blanching, in my opinion, that's just a night of good, clean fun.

Almendrados
Adapted from Cooking Light, Dec. 2011

I had leftover almond flour from previous cooking blog missteps.  That seemed easier than peeling almonds and then trying to get them dry enough for pulsing in a food processor.  Additionally, this was a fly-by-the-seat of my apron kind of recipe, made last minute because I almost had all the needed ingredients on hand.  Lemon zest became lemon oil, a fantastic gift from my mom the last time she was in Amish country.  Zest is probably easier to get than lemon oil, so either the oil or the zest of a small lemon.

2 - 2 1/4 c. almond flour
2/3 c. granulated sugar
1/4 tsp. lemon oil
Pinch of salt
1 large egg
1 tsp. ground cinnamon
24-30 whole blanched almonds

Preheat oven to 350 degrees.  Line 2 baking sheets with either sil-pat mats or parchment paper.

Add 2 c. almond flour to bowl of food processor, along with sugar, lemon oil (or zest), salt and egg.  Pulse several times until dough comes together.  It should be slightly sticky, but should all come together.  Add more almond flour as necessary to get to right consistency (I ended up a little shy of 2 1/4 c.)

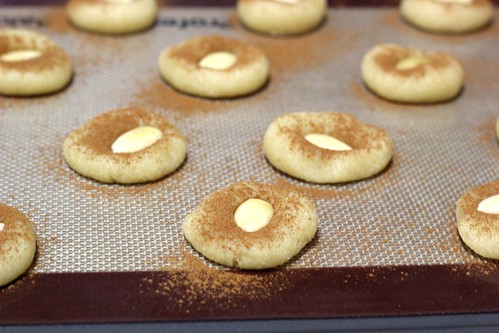
Turn dough out of food processor.  Using roughly 1 Tbsp. of fough, roll balls slightly smaller than a ping-pong ball.  Place on prepared baking sheet and light squish into a fat disk.  Repeat with remaining dough until all used.  Place cinnamon into a fine mesh sieve and lightly dust the dough disks.  Firmly press a blanched almond in the center of each cookie.

Bake in 350 degree oven for about 16 minutes, until cookies are a golden brown.  Remove from oven and let cool at least 3-4 minutes on the pan (this will help them come up cleaner).  Remove and let finish cooling on wire racks.

Friday, September 21, 2012

Vanilla Orange Biscotti


On Wednesdays, I have 6 am meetings.  As a frame of reference, I am normally trying to convince myself to roll out of bed only after 6 am on weekday mornings.  Needless to say, Wednesdays are not my favorite day of the week.  I am a little less friendly on Wednesdays.  I tend to drink 3 times as much tea on Wednesday.

I thought these early meetings were the worst.  Until this Wednesday.  Now this Wednesday was the worst.  You see, the 6 am meeting got cancelled and nobody told me.

That's right, I got to work at 6:05 (because I am never on time to 6 am meetings, I just can't do it), rushed to the conference room and it was black.  Dark.  Nobody.  I half considered staying in the dark and curling up under the conference table for a quick nap.  Looking back, I totally should have taken the opportunity.  The rest of the work day was a fog.


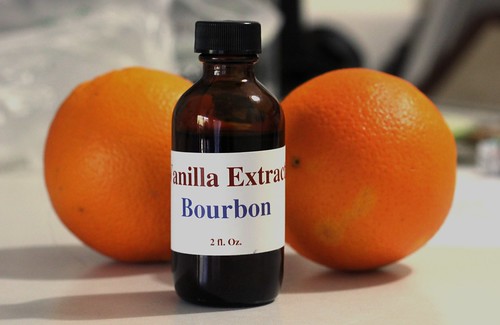
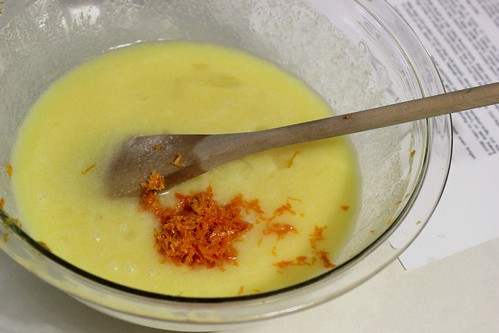
And then I got home.  I went into my kitchen, did some stuff, and came out with vanilla orange biscotti.  This is a new phenomenon for me, but there is something about zesting an orange that makes you just perk right up.  Horrible memories of 6 am meetings melted as I poured some good, locally made, incredibly alcoholic, vanilla extract into the dough and mixed.  And shaped.  Baked, Cut.  Baked again.

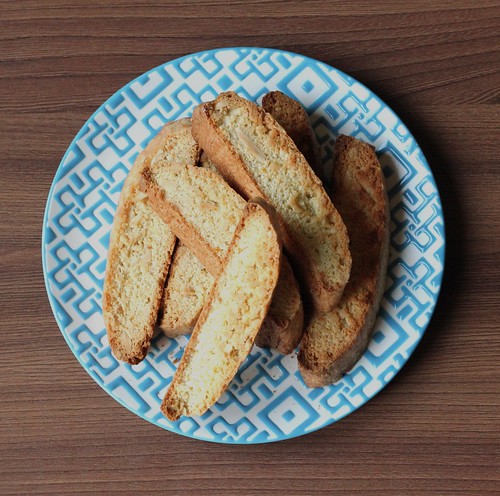
I thought about drizzling chocolate as a finishing touch, unsure how well the naked biscotti would hold up on its own.  But it was completely unnecessary.  Plus it required more time, more effort, and after these came out of the oven the rest of my night went something like this:  biscotti, tea, a little more biscotti while watching Everybody Loves Raymond, bed.  If only every Wednesday would end so well...


Vanilla Orange Biscotti
Adapted from the smitten kitchen, because of course Deb knows how to rock biscotti

Needless to say, BGCB.  These were fantastic and made a good sized batch.  Ben and I were able to somehow make them last 6 days.  They were just as crisp and crunchy the last day as they were the first.  Just make sure they are tucked away, hidden if you actually want them to last at all, in an air tight container and you'll be good to go.  They aren't making it longer than a week though, that's a guarantee!

1 1/2 c. sugar
10 Tbsp. unsalted butter, melted
3 eggs
1 Tbsp. vanilla extract (use your good stuff!)
1 Tbsp. Triple Sec (or other orange liqueur)
1 Tbsp. orange zest
3 1/4 c. all purpose flour
1 Tbsp. baking powder
1/2 tsp. salt
1 c.sliced almonds
1 large egg white

Preheat oven to 350.  Line cookie sheet with parchment paper or silpat, lightly dusting with flour.

In large bowl, mix sugar, melted butter, eggs, triple sec and orange zest well.  Sift flour, baking powder and salt into wet mixture.  Mix until well blended.  Add almonds and mix until evenly distributed.

Turn dough onto prepared baking sheet.  Using ample flour on your hands (dough is sticky!), divide dough into two even logs, about 2.5 inches wide and 1 inch tall, as far apart as possible on the sheet.  Whisk egg white until frothy and generously brush over dough logs. Bake in 350 oven until golden, about 30 minutes.

Remove logs from oven and allow to cool at least 15 minutes.  If you try to cut them while still warm, you will not have clean cuts.  Once cool, cut logs diagonally into 1/2 inch slices, using a serrated knife.  Discard parchment paper from baking sheet and lie slices cut side down.  Return to 340 oven and bake until golden brown, about 10-12 minutes.  Flip biscotti and return to oven to brown on remaining side, another 8-10 minutes.  Remove biscotti and cool on sheet a few minutes, before transferring biscotti to a rack to cool.  Enjoy!

PS - totally just realized biscotti is both singular and plural.  Or at least I think it is, and that counts for something, right?? 

Tuesday, September 18, 2012

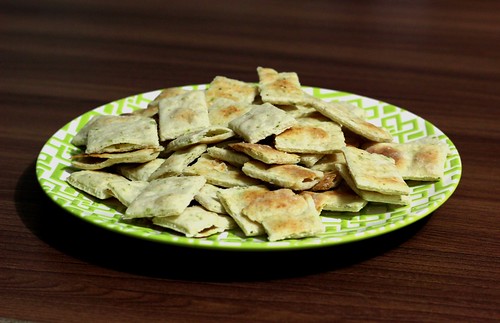
Parmesan Thyme Crackers


I'm sometimes afraid that people who randomly come across my blog are going to read the name and instantly think it's about being "green".  For the cooking to be about saving energy, reducing waste or any other manner of going "green".  I am all for going green, I reuse plastic produce bags and bring my own cloth sacks to the grocery store.  But that is not what this is about.  Besides my dislike of new plastic bags, the only real extent of my "green-ness", is my hatred of wasting food.

I've mentioned this before.  I only mention it again as an excuse to you for once again, so soon, repeating a recipe.  When my parents were visiting, we got my dad some half and half for his coffee.  And since only half of the half and half was actually used, I needed a vehicle for the rest.  Just days before I had sorted through my stack of newspaper cut-outs and magazine rip-outs, in an attempt to be better, and found this gem. 


Now, in my defense, this was a completely different recipe source than last time.  Ok, that was a lie, but a lie I just discovered.  Turns out Deb grabbed it from the same source I did.  Mark Bittman, New York Times, 2009.  So really, what you are looking at here is some marvelously easy Parmesan crackers, with the addition of some fresh thyme.  And a new newspaper article in my big green cookbook.  Because it always comes back to green.

Parmesan Thyme Crackers
Adapted from NYT article, February 2009

1 c. all purpose flour
1/2 tsp. kosher salt
1/2 c. freshly grated Parmesan cheese
6 sprigs fresh thyme
4 Tbsp. unsalted butter, cut in chunks
1/4 c. half and half

Preheat oven to 400 degrees.  Line a baking sheet with parchment paper.

In bowl of food processor, combine first 4 ingredients.  Pulse until combined well.   Add unsalted butter and pulse machine until butter and flour mixture come together.  Turn machine on and stream in half and half.  If necessary, add more half and half by the teaspoon until dough comes together, but is not sticky.

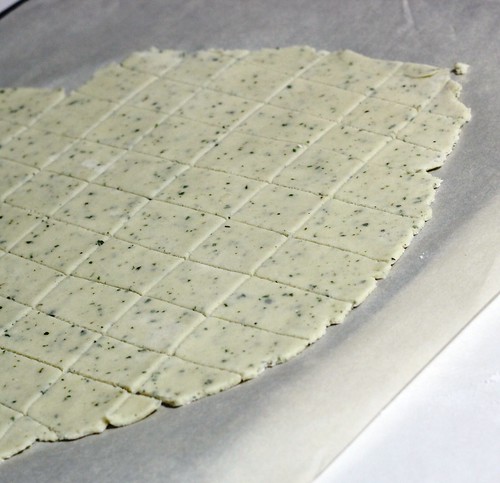
Turn dough out onto floured surface.  Roll dough out to about 1/4 inch thick, adding flour as needed to keep dough from getting sticky.  Once rolled thin, transfer dough to prepared cookie sheet.  Using dull side of a knife, score dough in checkered pattern.   Sprinkle lightly with kosher salt.

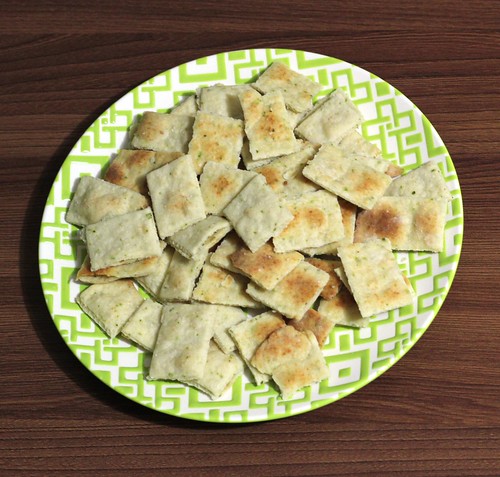
Bake until lightly browned, about 10 minutes.  Let cool on baking sheet and break apart.  Store extra in air tight container. 

Wednesday, September 5, 2012

White Chicken Chili


It has started.  Did you notice?  It doesn't exactly sneak up on you, so I assume so.  Football season.  It is here.  It's starting.  Today!  Well, I guess college already started with a bang, my Fighting Irish taking care of Navy.  We won by quite the margin, even if I don't quite remember the end of the game, as might be expected by an 8 am kickoff time and an all you can drink special.  (Know what I do remember?  Hang overs that start at 6 pm are not fun).  And tonight?  The first NFL game of the season is tonight.


Are you ready?  Have you had your fantasy football draft?  And if so, do you have any clever left over fantasy football team names that maybe I could use?  Most importantly, are you stocked up on soup, chili and game-watching snack recipes?  Cause that is what football is.  A pot of chili on the stove, chips and salsa, and some beer cooling in the fridge.  Football season, here we come.

White Chicken Chili

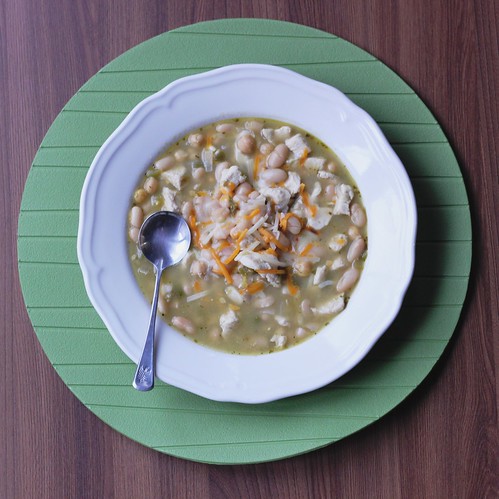
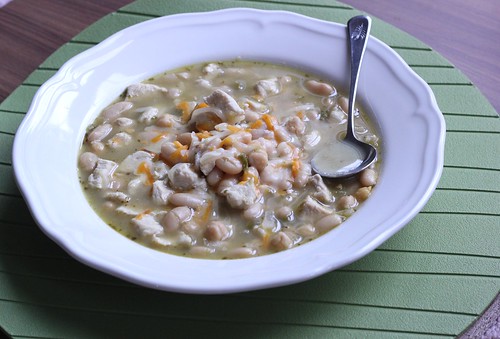
This would be great for a Sunday afternoon football watching marathon.  It comes together quickly and the longer it sits, gently bubbling away, the happier your taste buds are going to be.  My mom has been making this ever since one day in the supermarket I peeled off on of those free recipes hanging up in the spice aisle.  The paper has long since been lost, but the recipe most certainly has not.

1 Tbsp. extra virgin olive oil
1 ½ lb. boneless, skinless chicken breast, cut into bite sized pieces
¼ c. chopped onion
1 c. chicken broth
2 cans (4oz) chopped green chilies (I use 1 mild, 1 hot)
2 cans (19oz) white kidney beans (cannelloni), undrained (I've also used chickpeas)
2 green onions, slices, to top
Monterrey Jack cheese, to top

Southwest Spice Blend:
1½  tsp. Garlic Powder
1 ½ tsp. Ground Cumin
1 tsp. Oregano Leaves
1/8 tsp. Ground Rep Pepper (or more depending on your heat tolerance)


In dutch oven, heat oil over medium high heat.  Add chicken and onions and cook until chicken is done, about 5 minutes.  Add broth, green chilies and spice blend.  Bring to a simmer for at least 5 minutes.  Stir in beans and return soup to a simmer for 5 minutes.  Ladle into bowls and tops with cheese and onions.

Thursday, August 30, 2012

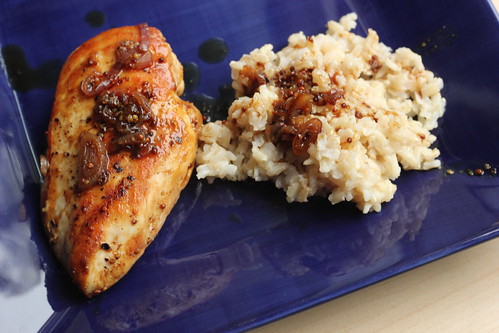
Honey Mustard Beer Chicken


I wanted to call this saucy chicken, simply because that is the best explanation.  Delicious, pan-saucy chicken.  But if I did that, then you might not be aware of the whole honey mustard beer party that is going on it that pan.  True, there is soy sauce too, but it got voted off the island because honey mustard soy sauce chicken is more an ingredient list, not a recipe title.


Few times have I made a pan sauce, although I'm not quite sure why, because I get it.  You take all those stuck on crunchy bits, all the juice that steeped out while the meat was resting, all that flavor, heat it up, cook it down and then just barely refrain from pouring it straight into your mouth.  I get that.  It works.  Ben, on the other hand, asks why I can just grill or bake the chicken for dinner at the first sign of a little smoke coming from the stove top.  Don't be Ben.  It'll be ok.  Pan-fry the chicken.  Make the pan sauce.  And if you sneak a spoonful or two while plating up, it'll be our little secret.

**UPDATE 3/13/13**   I made this again a few nights ago, the first time since I wrote the post.  I did double the sauce, and Ben and I were still wishing for more.  We served it on top of a bed of quinoa, ladling the sauce over top.  I am taking the liberty of updating the recipe below to reflect the doubled sauce.  It's by far the way to go!

Honey Mustard Beer Chicken
Adapted from CL September 2012

I served this with brown rice.  The sauce I was marveling about upstairs, pour it over the rice too.  Or if you're not concerned with silly things like picture taking before you eat (patience is never quite tested until you can't eat before getting a good picture...), go like this: rice, chicken, lot-o-sauce.  It'll make your rice ever-so-happy.  Trust me.  Speaking of, I plan on 1.5x or 2x the sauce on my next go round.  The sauce makes the dish.  Just in case that hasn't been clear enough...

2 tsp.canola oil
4 6 oz boneless, skinless chicken breast
black pepper & salt to season
2 shallots, thinly sliced
1 c. beer (used Leinenkugels)
1/4 c. soy sauce
2 Tbsp. whole-grain Dijon mustard
2 Tbsp. honey

In large skillet over medium high heat, heat oil until it shimmers.  Season chicken liberally on both sides with salt and pepper.  Add to hot skillet and pan fry until chicken is cooked through, about 6 to 7 minutes per side.  Remove from skillet and tent with foil to keep warm.

Add shallot to pan and saute until translucent, about 1 minute.  In small bowl, whisk together remaining 4 ingredients that form the sauce.  Make sure honey has dissolved into the sauce.  Add to pan and turn up heat to high.  Using a wooden spatula, scrap bottom of pan to loosen brown bits.  Add any accumulated juices from chicken to pan.  Bring sauce to a boil and maintain heat until sauce has reduced and thickened.

Add chicken back to pan and turn several times in sauce, to coat and warm.  Serve over rice or whatever can use a good soak in some yummy sauce!

Monday, August 13, 2012

World Peace Cookies


And against all odds, I am back from Minnesota alive, in one piece, well rested and a better fisherwoman to boot.  Unknown to me at the beginning, Minnesota turned out to be exactly what a late summer vacation should be:

A cup of tea while watching boats bob by the dock in the morning.  Followed by a few hours fishing with some wonderful, funny conversationalists.  Stuffing myself silly every day at lunch on extremely fresh, fried fish and enough sides and goodies to be on par with Thanksgiving.  Napping or reading in the afternoon sun, in front of the lake, with a breeze.  Then of course, a few cold beers and late evening fishing.


It was a perfect enough vacation to make you actually believe that things like world peace, and cookies that could bring about its existence, actually could exist.  Or in the case of these chocolaty, crispy, melty wonders, that they actually do exist.

World Peace Cookies
Who else?  Via the Smitten Kitchen

I've made these twice now.  These are not the gooey chocolate chip cookie kind of cookies.  They are sandy, like shortbread, but with marvelous little pockets of melted dark chocolate.  They're addicting.  Just cut them a little thicker than you think and you're in business.  Also, doubling this recipe just to have a log or two of dough frozen in your freezer is a very, very wise idea.

1 1/4 c. flour
1/3 c. unsweetened cocoa powder
1/2 tsp. baking soda
11 Tbsp. unsalted butter, room temp.
2/3 c. light brown sugar
1/4 c. sugar
1/2 tsp. kosher salt
1 tsp. vanilla extract
5 ounces bittersweet chocolate, chopped in small chunks

In stand mixer with paddle attachment, cream butter on medium speed until pale and creamy.  With mixer running, add both sugars, salt and vanilla.  Beat until mixture is well incorporated and fluffy, a few minutes.

Sift together flour, cocoa and baking soda.  With mixer running on slow speed, gradually add flour to butter as fast as you can.  It will poof and make somewhat of a mess.  It's cool, you'll soon have cookies to keep you company as you clean.  Mix only until just incorporated.  Add chocolate chips and just stir them in.  Try at this point to work the dough as little as possible.

Turn out the dough onto a sheet of plastic wrap.  Eye ball the dough into 2 equal pieces, each on their own sheet of plastic wrap.  Using your hands, roll dough into log, about 1.5 inches thick.  Wrap well in plastic wrap and refrigerate them at least 3 hours, or freeze.  (Deb's note: you can freeze the dough up to 2 months).

Preheat oven to 325 F.

Once very chilled, using a "sharp thin knife, slice the logs into rounds that are 1/2 inch think".  They're going to crumble apart like crazy on you.  Just do your best and squish them back into rounds.  Bake for 12 minutes at 325 degrees F (13 minutes if dough is frozen through).  "They won'y look done, nor will they be firm, but that's just the way they should be".  Let cool on cooling rack, resist the urge to eat immediately.  One, it'll totally burn your tongue.  Learn from my mistakes kids!  Two, they sort of really do taste better just slightly warm or at room temperature.  Share! Enjoy! Go World Peace!