Showing posts with label Snack. Show all posts

Wednesday, September 25, 2013

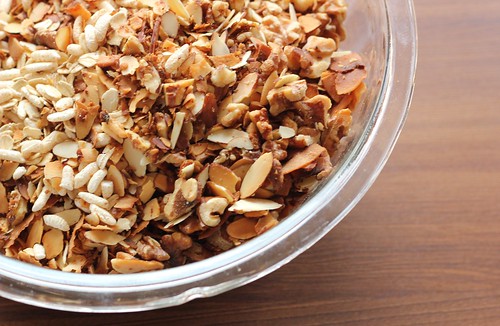
Lizbar's (aka Homemade Power Bars)


Ben takes the GRE today.  I am so excited, anxious, proud and nervous for him - all rolled up in one crazy little bundle.  I am both eager and on edge.  And I'm not even taking the damn thing.  I don't even know how he is managing.   Actually, he's probably managing a lot better.  He's a little less excitable than I am, and on top of that, he has more than prepared.

I am very proud of him and how he came at studying for the test.  It has been a long time in the making.  He has been extremely dedicated, carting his studying material (including the 5 pound book of questions!  Which, title aside, actually weighs closer to 6 pounds) to each of our last 3 vacations.  Making time to study while I go play with our nephew or nap in a hammock.  Spending many weekend afternoons tucked away in the spare bedroom or studying in the car while I drove.  He has been beyond committed, and I find myself constantly impressed and beaming with pride.
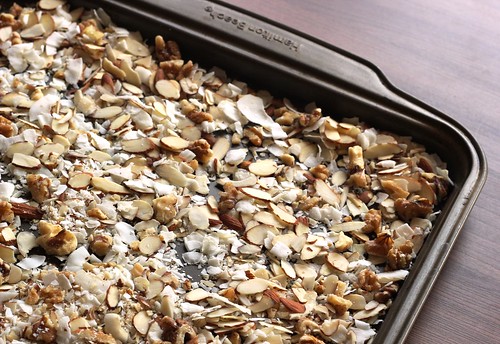

If I were a fiance that was a little more on top of her stuff, this is the exact snack that I would have made for Ben to eat right before the test.  Overloaded with nuts, whole grains (yay for oats!) and just enough espresso powder to give you a little jolt, I imagine they are great kick-butt-on-standardized-tests food.  Unfortunately, I am not the fiance that's on top of her stuff, so luckily for me, they also work great as pre-gym snacks as well.  So that is what Ben is getting for finishing his test - a large batch of Lizbar's, made with love, to help him ease his way back into the gym rat he misses being.


So, today I sit at my desk in Rockford, anxiously tapping my foot, knowing that this is something completely out of my control.  And it will drive me nuts until I get that long awaited call this afternoon to tell me he is done and that he did great.


Lizbar's (aka Homemade Power Bars)
Adapted from 101 cookbooks

These are also fabulous for those afternoons that at 2 PM you can't imagine staring at a computer anymore.  They are lightly sweet, have just the right small bit of caffeine and, if you add chocolate, just about perfect for giving your behind the little swift kick it needs to get you through the day.

The recipe is very adaptable.  Add whatever nuts you want or have on hand.  Throw some seeds in there too, if you'd like.  Add some dried fruit if you get the feeling.  And, really, you can't go wrong with a few mini chocolate chips sprinkled on top.

Lastly, I usually use my 9x13 pan for this.  It makes thinner bars, similar in size and thickness to a Clifbar.  If you like yours thicker (think size and thickness of a Quaker Chewy bar), go for a 9x9.

Coconut oil, for greasing
1 c. walnuts, chopped
1 c. chopped almonds
2/3 c. unsweetened shredded coconut
1 1/4 c. rolled oats
1 1/2 c. unsweetened crisp brown rice cereal
1 c. brown rice syrup
1/4 c. natural cane sugar (sugar in the raw)
1/2 tsp. kosher salt
2 Tbsp espresso powder
1 tsp. pure vanilla extract
1/4 c. mini chocolate chips

Preheat your over to 350.  Generously grease a 9x13 pan with coconut oil and set aside.  On a rimmed baking sheet, toss walnuts, almonds and coconut.  Toast in the over for 5-7 minutes, until coconut is golden.  Toss a few times to avoid the nuts and coconut burning.

In large bowl, combine toasted nuts, coconut, oats and cereal.  Mix well.  It is easier to evenly distribute the ingredients now, then it will be after pouring the syrup over them.

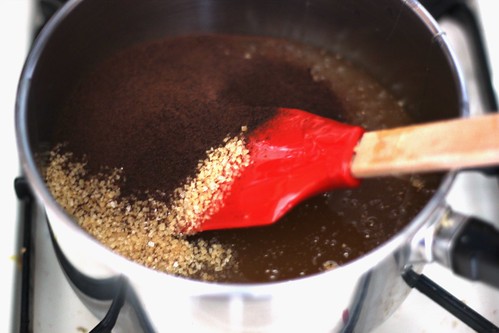
On the stove, in a large saucepan over medium heat, combine the wet ingredients (brown rice syrup - vanilla).  I find it easiest to handle/measure/pour the brown rice syrup if I heat it up for a few seconds in the microwave first.  Bring mixture to a slow boil, stirring constantly.  Continue to cook, while stirring, another 4-5 minutes, until the syrup thickens slightly.  Remove from heat and pour over nut/oat mixture.  Stir (slow and gentle!), until syrup covers the nuts and oats completely.

Pour into prepared pan and lightly push down.  Wait a few minutes for mixture to cool, then sprinkle chocolate chips on top and lightly push into bars.  Let cool to room temperature (a few hours).  Flip out onto cutting board and cut into 16-24 bars.

Thursday, November 15, 2012

Honey and Spice Apple Chips


There is a question that has been bothering me for awhile.  It has to do with what we are doing right now.  More importantly, it has to do with what you want from me.  In the beginning, it was easy enough to go on for awhile about the true terribleness of my photographs, regale with stories of lonesome Saturday nights and backyard barbecues and more than likely bore you in general with occasional work stories and complaints about the weather.

But now, 9 times out of 10, I have no idea what to say to you.  I sit and stare at an empty blogger page.  Do you want a witty anecdote?  My step-by-step reaction to the recipe?  Are you even out there at all, to care about what I put down here? Or am I that crazy woman, yelling at a wall?


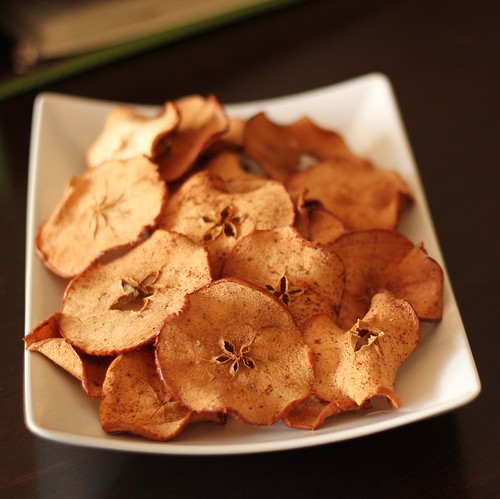
This is deep for apple chips, I know, I'm sorry.  The truth is, I have no anecdote for apple chips, no recipe reactions.  I am a big fan of apple chips and was intrigued that I could make them and they would be prettier than store bought.  And that is the basic, boring and strange  reason I choose this recipe, because the result would be pretty.  It would end not in broken pieces in a cloud of cinnamon dust, but  in whole, gorgeous slices of applies with stars in the middle.  Because I needed some pretty stars in my life.  Who doesn't?

Lucky for me, the pretty stars lead to a yummy snack that didn't even last a whole morning.  The recipe for these beauties is a keeper, even if the rest of my words are not.


Apple Chips

3 apples (I used a honey crisp, a Jona-gold and a Pacific Rose)
Juice of one lemon
1/2 tsp. cinnamon (heaping, of course)
2 tsp. honey
1/4 tsp. nutmeg
1/4 tsp. kosher salt
1/4 tsp. vanilla

Preheat oven to 225 degrees.  Line two rimmed baking sheets with parchment paper.
In small bowl, whisk together all ingredients, except apples.  Set aside.

Thinly slice apples.  I used a mandolin, which is best for me because it gives super thin, constant slices.  Pop out seeds and hard pieces of core as necessary.  Place in very large bowl and toss with lemon/honey/spice mixture.  The larger the bowl, the easier it will be to toss apple slices.  If necessary, hand rub mixture onto slices, so everything is evenly coated.

Line coated apple slices in a single layer on prepared baking sheets.  Bake in a 225 degree oven for 2 hours, flipping slices over after the first hour of baking.  Chips should be dry and crisp as they come out of the oven.  Let cool and if you don't eat them all right away, store in an airtight container!

Monday, March 19, 2012

Roasted Chickpeas


 It's been quite the fast-paced, exciting week.  First off, spring has managed to keep up the good fight and has refused to let winter return.  And seeing as tomorrow is the official start of spring, that means that we're done with snow for the year, right?  Don't answer that, I'm ok living in my ignorance.

Secondly, I've become an aunt!  And I couldn't be more excited.  My nephew was born on the ides of March, is a beautiful baby of 7 lbs 1 oz and officially, legally has the middle name "Danger".  I cannot wait to see who this kid turns out to be 7 years from now... I imagine many bruises and a few broken bones.


Lastly, on this brilliantly sunny and warm Sunday, I started an herb garden!  In the spirit of full disclosure,as of right now my herb garden consists of 3 pots of leafy green things that I luckily have not managed to kill yet.  But still, I'm excited.  I checked this morning and my cilantro, chives and mint are all still alive.  So far, so good.  I've always wanted a vast array of pots full of herbs, so this is especially exciting for me.  And as soon as I get more pots, I plan on expanding.  I'm thinking basil.  Thyme. Tarragon.

So, how does this all tie into roasted chickpeas?  Well, one, even though they are roasted, your oven is only on 20 or so minutes, so you're not heating up the entire apartment, which is great for 75 and sunny.  Two, maybe this is a good just-became-a-mommy snack, full of protein and easy to make.  Scratch the maybe, yes, and Katy, if you want some I will bring a jarful when I come to visit.  And finally, well, I'm just excited about my herbs in general.  Maybe the second round will have some fresh chives, or thyme.  I have to buy and plant thyme first though.  Baby steps with the herb garden.

 So, with all the stretching to make roasted chickpeas applicable in this rambling post, the truth is I've been seeing them on pinterest and tastespotting and I wanted to try them.  I was told they would taste like popcorn.  A myth that I am choosing to dispel right away.  These do not taste like popcorn.  The closet thing that resemble are Corn Nuts, although I won't be putting them on any Kwanzaa cakes anytime soon.  Ben wrote these off immediately.  I chomped a few, ate some sorbet, grabbed a few more.  I continued to reach for them sporadically throughout the weekend and just finished up the batch this morning.  It took me four days to form an opinion, but I would say I like them.  Especially when you intersperse the handfuls with a few dark chocolate M&M's, a combination I happily munched on all morning at work.  They're different and as long as you're not expecting them to taste like popcorn (see above), you just may enjoy them too, although it might take you 4 days to realize it.

Roasted Chickpeas
From Running to the Kitchen

As with roasted nuts, I would imagine these are infinitely adaptable to whatever spice combination tickles your fancy the most.  Try this.  Or try the recipe as is below, because they did smell absolutely WONDERFUL roasting up in the oven.  Like spicy apple pie.  Ok, maybe that doesn't sound good, but it sure smelled delicious.

1 can (15 oz) chickpeas
1 Tbsp. extra virgin olive oil
3/4 tsp. cumin
1/2 tsp. (heaping) paprika
3/4 tsp. cinnamon
1/4 tsp. coriander
1/4 tsp. ground cloves
1/4 tsp. kosher slat
1/8 tsp. (heaping) cayenne pepper

Preheat oven to 400 degrees.  Line rimmed baking sheet with aluminum foil or silicone baking mat.  If using foil, spray lightly with cooking spray.

Rinse chickpeas thoroughly and drain.  Turn into shallow dish and drizzle with olive oil.  Combine all spices and sprinkle over chickpeas.  Toss everything until coated evenly.  Transfer to prepared tray and spread out evenly.

Roast chickpeas in 400 degree oven for 20-30 minutes, tossing every 8-12 minutes, so chickpeas roast evenly.  Let cool on pan and serve!  For any remaining chickpeas, keep in airtight container for 3-4 days (that's as long as mine lasted!)

Wednesday, September 28, 2011

Old Fashioned Kettle Corn


Did you know that the perfect kernel humidity for popping pop corn is 14%?  No?  Really?  You mean this isn't a universally recognized and randomly memorized fact?  Are you sure?  Hmm... I guess it's really only something you would know when dating the son of the son of a popcorn corn farmer. 
 
But of course you know it's all about the humidity if you want large fluffy popped corn and not a lot of old maid's at the bottom of your pot.  Right?  No, not that one either? 
 
I suppose you might ask what an old maid is too.  Huh...  there's a lot more to being the girlfriend of the son of the son of a popcorn corn farmer than I originally thought.  Oh, and old maids are the kernels left behind, those that are un-popped.  Haha, get it?  No, really, I swear that is what they are actually called. 

Being somewhat close to related to a popcorn farmer, you learn things like this.  And you also end up with a few container-fulls (of course, air tight, remember the humidity!) of popcorn kernels.  Subsequently, when you see popcorn recipes, you kinda get excited.  Even more so, when you have been sans microwave for 4 months now and are starting to jones for a 90 calorie bag of kettle corn.  And though I doubt this is 90 calories, it sure went down quickly.

It came together even faster, although I am lucky to be dating the owner of a nifty-difty, home-fashioned pop corn popping pot (see right).  But, the original recipe suggests it could be made with a big pot and spoon.  So you could try that, or find your own son of a son of a popcorn corn farmer.  Is that getting old yet?   Anyways...

Ben and I made this last Sunday, before I headed home from Chi-town.  We ate the majority of it in the next hour and Ben polished off the rest later that night. So you know it was tasty.  That being said, we both had the same critique.  It is one dimensional.  You really only get a single note.  I'm not sure if that's because the brown sugar didn't caramelize as well as white would have or what.  My short lived research on the subject revealed that most recipes stick to oil, sugar and salt, so I'm not sure what it could have been missing.  A dash of a cayenne maybe and a little less salt might be worth a shot.  A small sprinkle of, what else, cinnamon?
 
Or, and this just came to me... popping in flavored oil.  I bought a bottle of meyer lemon olive oil a while ago.  Just imagine, lightly lemony, light sweet, just a hint of salt, freshly popped popcorn!  Not your traditional kettle corn granted, but that would have gotten old fast.  Just an idea...

Old Fashioned Kettle Corn
Inspired by Marcus Samuelsson

Don't worry about buying a whole jar of un-popped corn.  Popcorn is not only a delicious, but when done right, nutritious snack, dessert, what have you.  Did you know that popcorn counts as a whole grain?  And that you're supposed to be getting lots of whole grains every day?  That's what I call two birds with one stone.  Pop up some corn plain and top it with freshly grated cheese and chopped herbs.  Or mix it warm with mini chocolate chips and dried cranberries.  You may not even miss microwave popcorn... or you know only miss those 90 calorie bags just a little, teensy bit.

1/2 c. unpopped popcorn kernels
1/4 c. packed brown sugar
3. Tbsp. olive oil
1/2 - 3/4 Tbsp. sea salt

In a large pot, over medium high heat, let oil get hot.  After a few minutes, test temperature by throwing in a few kernels.  If they pop quickly, you're ready to go.  Add kernels and brown sugar and quickly stir well, so kernels are well coated.

Put lid on pot and wait for kernels to start popping.  Grab pot (which will be hot, hot, hot) with potholders and swirl kernels around pot.  Get the kernels moving in a circular motion, with the lid on, continually moving to avoid burning the sugar.  Take pot occasionally off flame if necessary.

When popping how slowed and there are a few seconds in between pops, take pot of flame.  Let cool for a few minutes.  Pour popcorn into large bowl and sprinkle with sea salt.  Add a little at a time, tasting until seasoned correctly.  Enjoy!

Wednesday, April 27, 2011

Spiced Candied Pecans


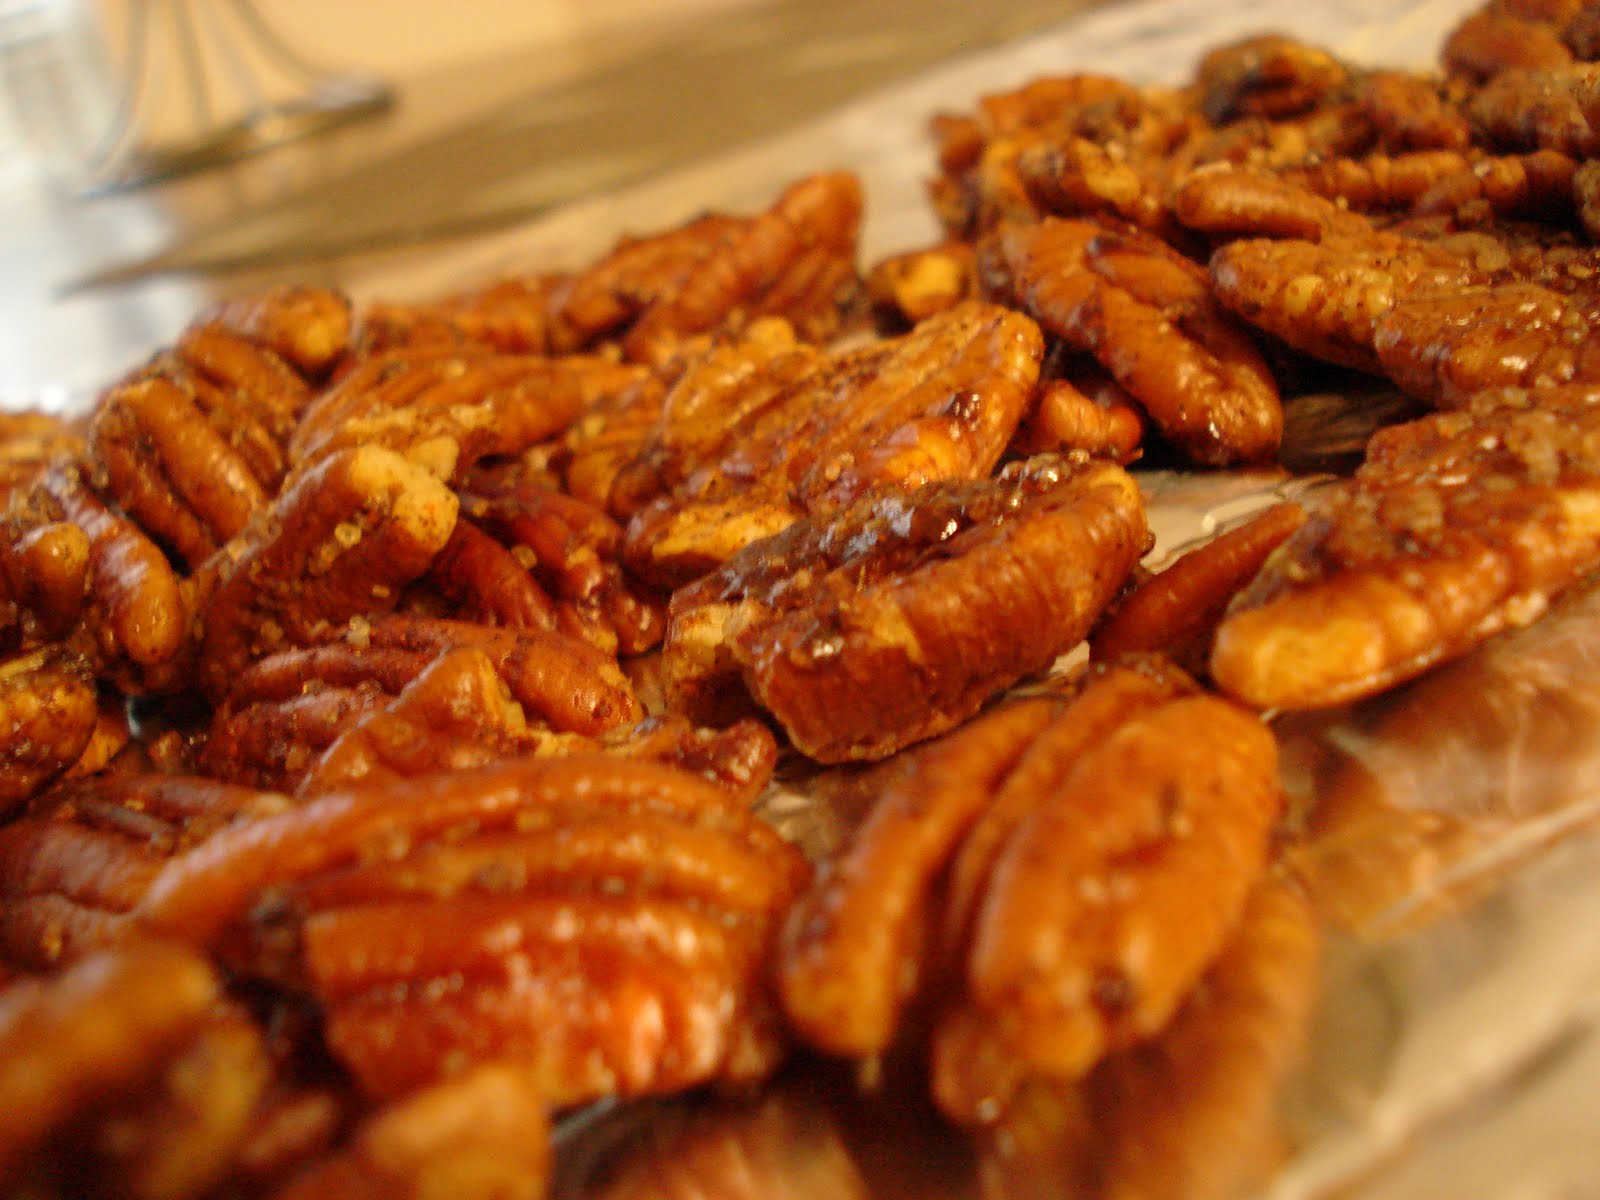
After a long weekend of porking out on delicious food and helping to cook in a kitchen that rivals mine for lack of space, cooking something elaborate seemed like too much work.  Cooking anything requiring more than one dish and 10 minutes seemed like too much work.  Yesterday was leftovers and some corn on the cob I boiled up quickly.  Today so far has been 2 pickles and snacking on random goodies as I unpacked my groceries.  But I felt that if I went to long without writing, I might get into the habit of going really long without writing.  That, and an attempt to start eating more "healthy fats" in my diet, made me pull out a tried and true recipe.  Spiced Candied Pecans.... yum...

The good thing is that nothing could be easier.  I discovered this somewhere online 2 summers ago when I was living in Providence.  I began to make them weekly, to the extent of annoying my roommate, which was a relatively easy mission to accomplish.  I mostly put them either on my spinach salads I brought for lunch or snacked on them whenever I was home.  Even a double batch never lasted long.  I varied from the original recipe instantly, and probably couldn't even recall it if you wanted.  By why would you?  I used it for the ratios and after a few initial experiments haven't varied it since.  If it ain't broke, don't fix it?

My version has 6 ingredients.  The first thing I do is mix up the sugar and spices.  My one claim to be adventurous tonight was to use turbinado sugar instead of normal sugar, my first time deviating from that specific part of the recipe.  I must admit that substitution came purely from laziness though.  Turbinado was in the front of my pantry and easily accessible.  Regular sugar was under the flour in the back right corner, behind rice, brown sugar and various other random pantry items.   It was a no brainer.  So, 2 teaspoons of sugar.  A heaping 1/4 teaspoon of both cayenne and cinnamon.  That's a lot of cayenne, by the way, if you don't like the heat.  A pinch of kosher salt.  Mix well and step 1 is done.

Step 2 is just as easy.  Melt 1 tablespoon of butter over medium high heat.  Add 1 cup of pecans.  Stir frequently and keep the nuts moving so they don't get burnt.  After a few minutes, they will deepen in color and smell toasty, not a strong smell, but it's still there.  I probably should have timed it for ya'll, but you'll probably be able to tell.  Let's say about 3-5 minutes??

And finally, step 3.  Told you this was easy.  With the pan still on the heat, sprinkle your sugar and spice mixture over the pecans.  I'll sprinkle a bit, then toss, sprinkle then toss, until everything is well coated.  Remove from heat and keep occasionally tossing in the pan another minute or so.  Spread out of aluminum foil and let cool.  Easy, peasy.  No headache, a few dishes maximum and a cup or 2, if you do a double batch like me, of yummy, toasted, spiced, candied pecans.  I really don't think I could throw another adjective in front of them.

Super easy, super yummy and super adaptable to whatever your tastes are!  Oh, and in case you were wondering, the turbinado sugar worked great, melting mostly but also leaving a few crunchy granules on the finished product, something I am at the very moment enjoying.  If you have it on hand, I would suggest it; if not though, it's not worth a special trip to the store.  Normal sugar works fantastically as well.  I've also been meaning to experiment with some cocoa powder lately, but, alas, will have to wait for a day when I'm not lazy, poorly fed and exhausted.


Spiced Candied Pecans

1 Tbsp. butter
1 c. pecans
2 tsp. sugar
1/4 tsp. cayenne pepper
1/4 tsp. cinnamon
Pinch of salt

Melt butter in large skillet over medium heat.  Add pecans and toss frequently, until pecans are toasted and become a deeper brown in color, about 3-5 minutes.

While still on heat, pour sugar/spice mixture over pecans and toss until well coated.  Remove from heat and continue tossing.  Spread pecans out over aluminum foil to cool.