I wanted to thank you guys for letting me enter wedding mode last post. But I feel I should warn you, it was only the tip of the iceberg. And now the ice has broken and something I tried to keep away from this space has come into it anyways. And let's face it, it won't go away. Besides, the way I was keeping it out of this space was by physically not being in this space as well, which was not as much fun for me. So, now the two world's shall collide. Wedding planning and food. Registries and recipes. Guest lists and granola.
I am nothing if not a master of smooth lead in's...
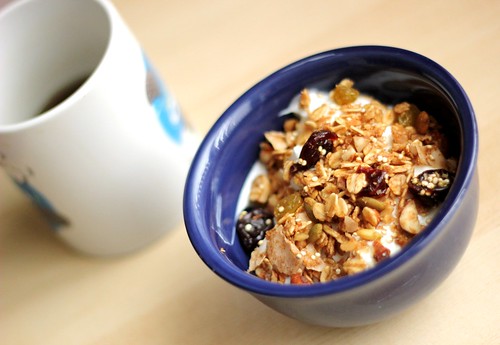
The jury is still out on if this theory holds any truth or not, but I would venture to say that when it comes to the case of granola, homemade just has to be better for you. Or at least that is what I'm telling myself as a repeatedly chomp on handfuls of this stuff. Yes, there is oil and sugar and what not. But I put it in there, so it must be better... Thank heavens I don't have to worry about a wedding dress fitting for at least a few more weeks.
And with that, we have come full circle. Now it is time for me to peace out, for today? Today is cake tasting day!!
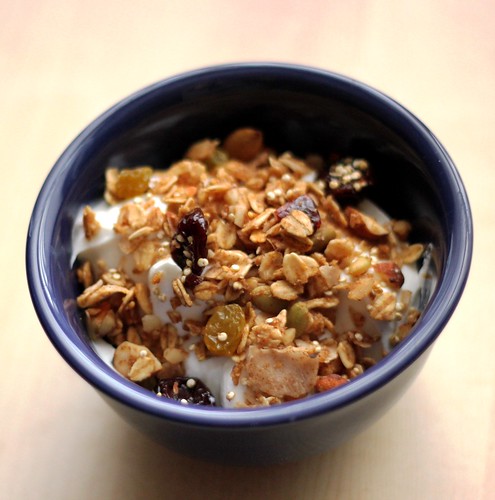
Coconut Quinoa Granola
Adapted from Sweat Pea's Kitchen
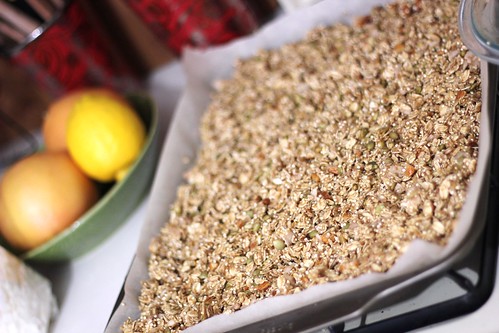
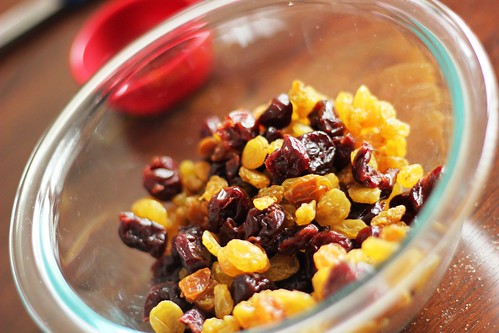
This is a quick, easy recipe and was immediately inducted into the big green cookbook. The great thing with most granola recipes is that it is a rough guideline. Use whatever dried fruit you have on hand - blueberries, tart cherries (a personal favorite). Use whatever nuts as well. Just go with what you are feeling.
3 c. old fashioned oats
1/2 c. quinoa (uncooked)
1/4 c. wheat germ
1/4 c. pepitas (pumpkin seeds)
1/2 c. chopped almonds
1/2 c. shredded, unsweetened coconut
1/2 c. brown sugar
1 tsp. cinnamon
1/4 tsp. kosher salt
1/4 c. honey
1/3 c. coconut oil
1 tsp. vanilla extract
1/2 c. dried cranberries
1/4 c. golden raisins
Preheat oven to 300 degrees F. Line a rimmed baking sheet with parchment paper.
Combine first 9 ingredients (through salt). Spread evenly over baking sheet. In small bowl, melt coconut oil. Whisk in honey and vanilla extract until smooth. Pour over oat and nut mixture. Toss until oats are coated, then spread flat on baking sheet. Bake at 300 for 30-40 minutes, until granola is a light golden brown. Toss at least 4 times, to ensure granola does not get burned in spots.
Once golden brown, remove granola from oven and add cranberries and raisins. Toss to combine. Let cool. To store, keep in airtight containers.